[Step by Step] Configuring AD RMS for Exchange 2016
On my previous blog, I have gone with the step by step for the installation and configuration of AD RMS on Windows server 2016. But configuring Installing and Configuring AD RMS will be just applied to the just office documents. And what if we need to get it configure on Exchange. So, on this blog, I am sharing my knowledge on How we can configure AD RMS for Exchange 2016.
ADRMS uses encryption and a form of selective functionality denial for limiting access to documents such as corporate e-mails, Microsoft office documents, and the operations authorized users can perform on them. Companies can use this technology to encrypt information stored in such document formats, and through policies embedded in the documents, prevent the protected content from being decrypted except by specified people or groups, in certain environments, under certain conditions, and for certain periods of time. Specific operations like printing, copying, editing, forwarding, and deleting can be allowed or disallowed by content authors for individual pieces of content, and RMS administrators can deploy RMS templates that group these rights together into predefined rights that can be applied.
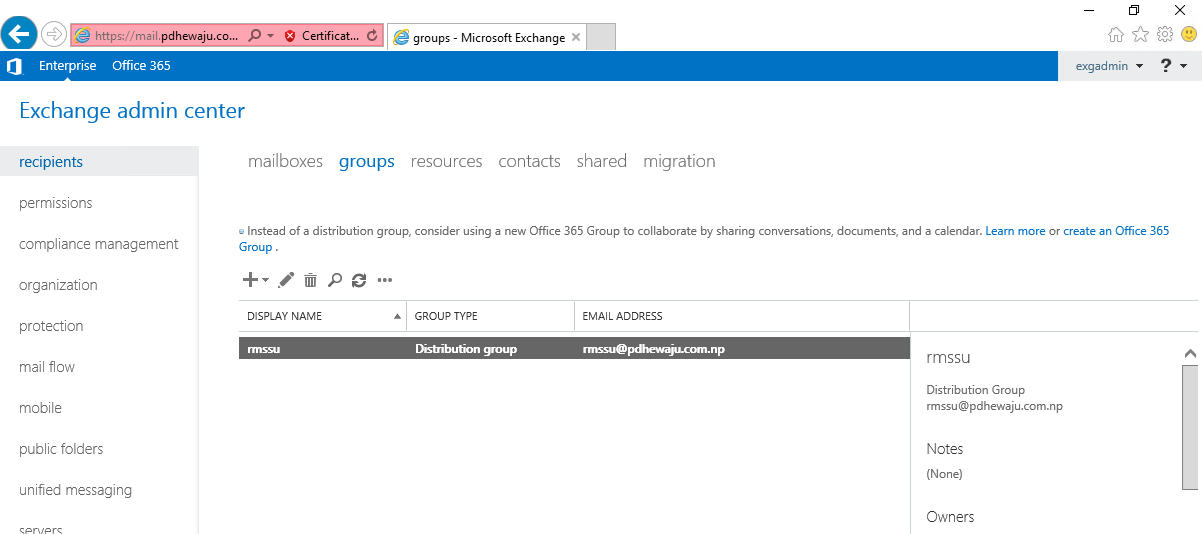
Before Starting with the integration of AD RMS with Exchange server, we need to have create a distribution group on Exchange server as of below.
Configuration on AD RMS Server:
Once this is done verify with the SCP.
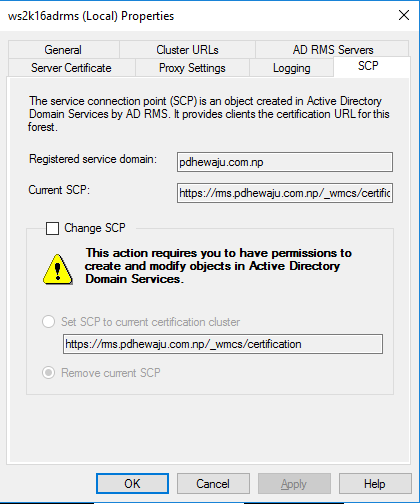
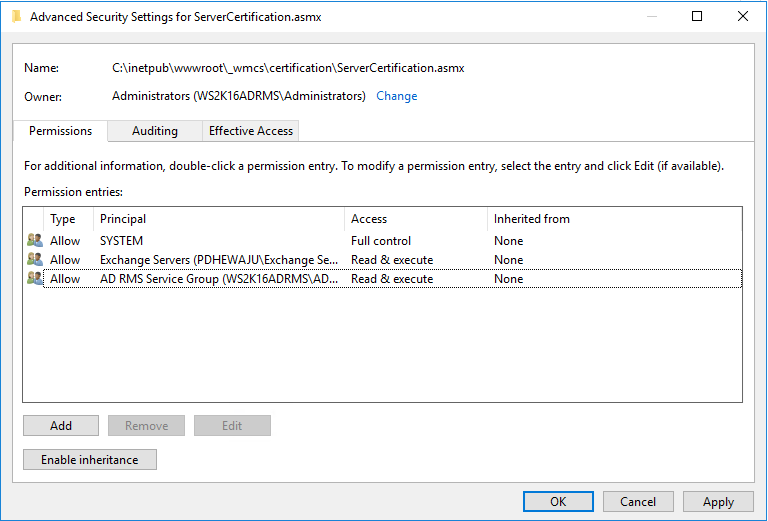
Now the SCP has been confirmed as registered, we need to configure permissions so that the Exchange 2010 server can integrate with the RMS server as, by default, it will not be able to do so. Specifically, we need to give two groups permissions to the RMS certification pipeline; these groups are named Exchange Servers and AD RMS Service Group with Read &Execute and Read. This is achieved by modifying the security permissions on the ServerCertification.asmx file that is stored on the RMS server. By default, this file is found in the \inetpub\wwwroot\_wmcs\certification folder. When you have located this file, bring up its properties and click the Security tab.
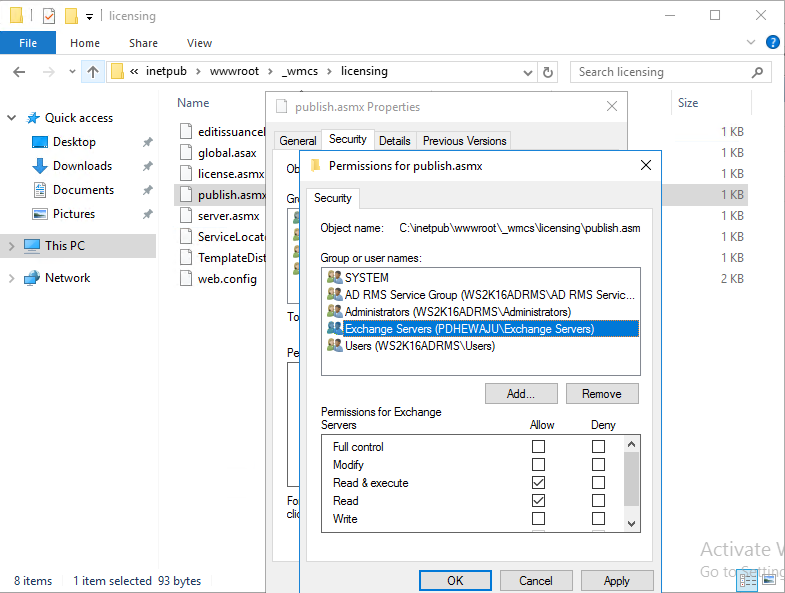
Also for the Publish.asmx store at \inetpub\wwwroot\_wmcs\licensing folder, provide the ‘Read’ and ‘Read & execute’ permission.
Active Directory Server:
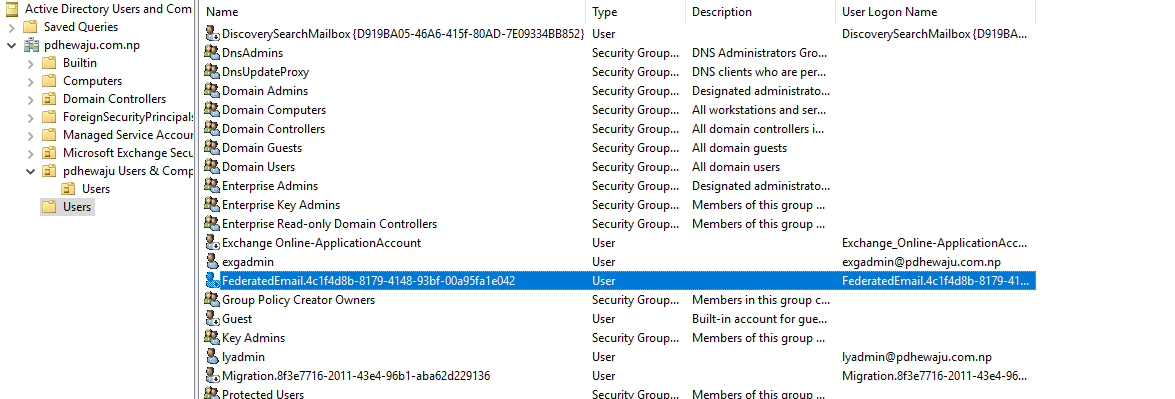
After completing all those action, go to your Domain Controller on Users OU you can see the FederatedEmail account. Copy the user name of it for the further purpose of configuration.
Configuration on Exchange Server 2016:
On the Exchange server open EMS console, on which run the below cmdlet to add the FederatedEmail ( which you had copied earlier) on the distribution group created earlier.
[PS] C:\Windows\system32>Add-DistributionGroupMember -Identity "rmssu" -Member FederatedEmail.4c1f4d8b-8179-4148-93bf-00a95fa1e042

After adding the FederatedEmail, let’s test the IRM (Information Rights Management) for the Exchange server with one temporary account. To test it you can use below cmdlet. During the testing if you face an issue regarding the permission, here is the blog I am posting which can help you to sort out it.
[PS] C:\Windows\system32>Test-IRMConfiguration -Sender exgadmin@pdhewaju.com.np
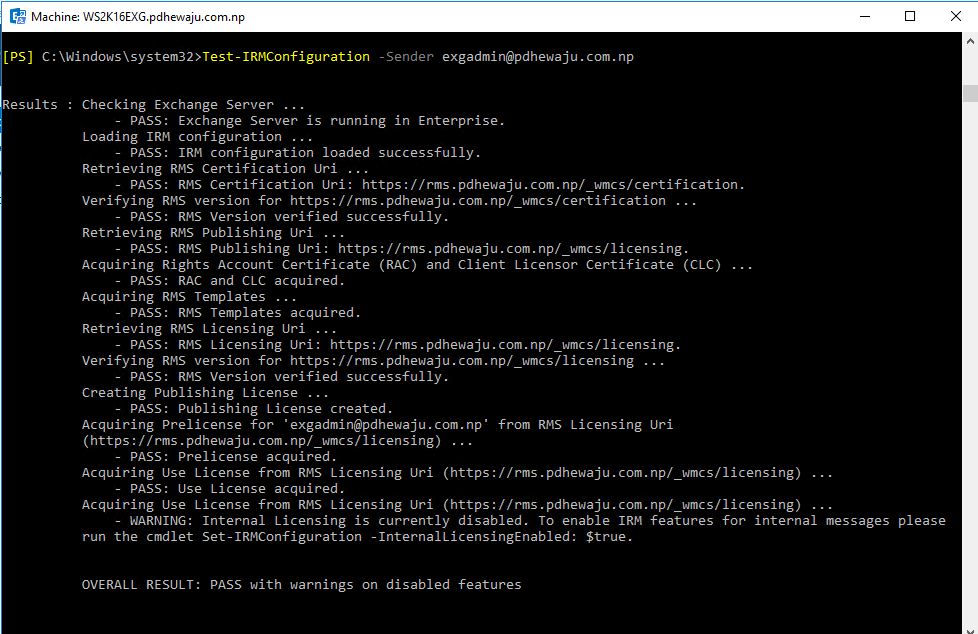
If the testing for IRM get succeed, we can enable the IRM configuration with below cmdlet.
[PS] C:\Windows\system32>Set-IRMConfiguration -InternalLicensingEnabled $True

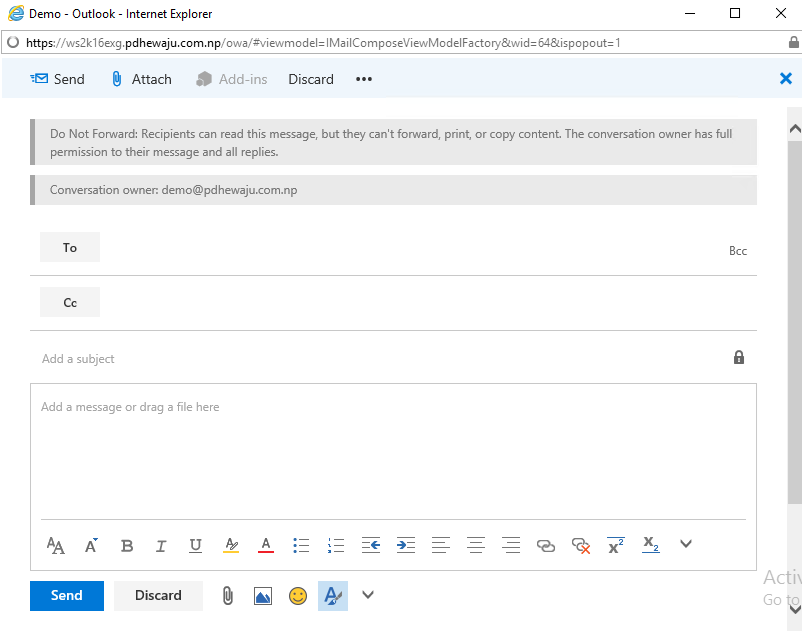
Now, if you go to your Web Browser of Exchange server and try to send New Email. You can see the ‘Set Permissions’ as ‘Do Not Forward’ this is the default permission which appears. Although we can have different permission. Which will be blogging on later post.

So, if you select the Permission you can see what actually happens if you apply these to your email…
Hope this was quick and general configuration for RMS to your Exchange Server 2016. For further post keep following :D.
Related Posts

What new in Windows 8?
![[Fix] Windows 7 Black Screens for Some AMD/ATI GPUs](/wp-content/themes/ribbon-lite/images/nothumb-related.png)
[Fix] Windows 7 Black Screens for Some AMD/ATI GPUs
[Solved] There was a problem verifying the certificate from the server for SFB 2015
About Author
pdhewjau
Prashant is a Principal Cybersecurity Specialist at Thakral One Nepal. His prior position as a Modern Work Security Specialist at Microsoft saw him providing invaluable guidance to major clients in Bangladesh, Brunei, Cambodia, and Myanmar, assisting them with their foundational security needs. Awarded the esteemed Microsoft Most Valuable Professional (MVP) accolade in 2017, Prashant is recognized globally among Microsoft peers. Since 2010, he has imparted his expertise as a Microsoft Certified Trainer (MCT), conducting specialized training across Nepal.
Add a Comment
Cancel reply
This site uses Akismet to reduce spam. Learn how your comment data is processed.
We configure ADRMS on windows Server2008 R2 with SQL 2012 on premises.When we compose/consume(Restrict edit template) email on office professional (Any version) and send to client which are using Office (2010,2013,2016) home and business, on client outlook email does not allow to forward.It give an error “Operation Failed”… Your assistance is required..
Is this error only on Office Outlook or with Outlook Web Apps too?? and what is the version of your Exchange Server.
Thanks, this article helped resolve my problems with AD RMS and Exchange.