Install and Configure Standalone Skype for Business 2015 on Windows Server 2016
On my previous blog, I have share that what actually is Skype for Business?. As mentioned earlier, we can have both the version of Skype online or on-premises. You just need to have knowledge for the configuration of online Skype for Business machine whereas, you need to have both installation as well configuration knowledge for the Offline/On-premises version of Skype for Business. Before going on the configuration part, I am here to share knowledge on how we can Install and configure Skype for Business 2015 (SFB 2015) on our local server. If you want to learn on installing SFB 2015 on Server 2012 or 2012 R2, you can find enough blog, but with the Server 2016 I don’t think there are any till the post of this blog. And here I am sharing on how we can install SFB 2015 on Server 2016 and how to go with work around if arises there any issues.
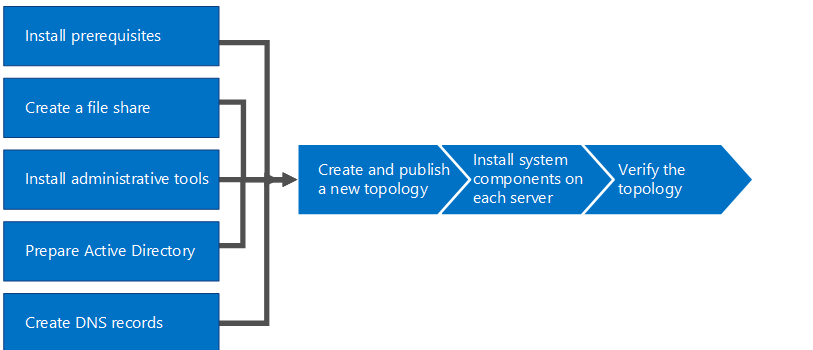
To Install and configure SFB 2015 on Server 2016, we will follow the procedure as of the below Diagram.
Here is the Hardware and software architecture I am going use for the standalone installation process of SFB 2015.
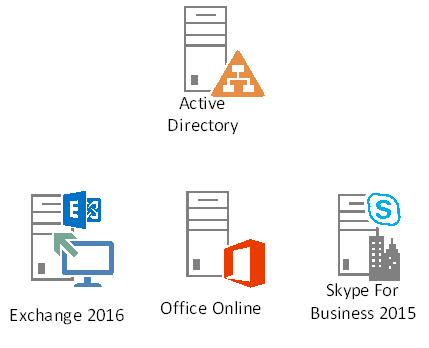
| Role | Server OS |
| Active Directory with Certificate Authority | Windows Server 2016 |
| Exchange Server 2016 | Windows Server 2016 |
| Office Online Server | Windows Server 2016 |
| Skype For Business 2015 (Standalone) | Windows Server 2016 |
Here is Step by step Process we are going to follow this installation and configuration part.
Install Prerequisites:
Add-WindowsFeature NET-Framework-Core, RSAT-ADDS, Windows-Identity-Foundation, Web-Server, Web-Static-Content, Web-Default-Doc, Web-Http-Errors, Web-Dir-Browsing, Web-Asp-Net, Web-Net-Ext, Web-ISAPI-Ext, Web-ISAPI-Filter, Web-Http-Logging, Web-Log-Libraries, Web-Request-Monitor, Web-Http-Tracing, Web-Basic-Auth, Web-Windows-Auth, Web-Client-Auth, Web-Filtering, Web-Stat-Compression, Web-Dyn-Compression, NET-WCF-HTTP-Activation45, Web-Asp-Net45, Web-Mgmt-Tools, Web-Scripting-Tools, Web-Mgmt-Compat, Server-Media-Foundation, BITS

Create a File Share:
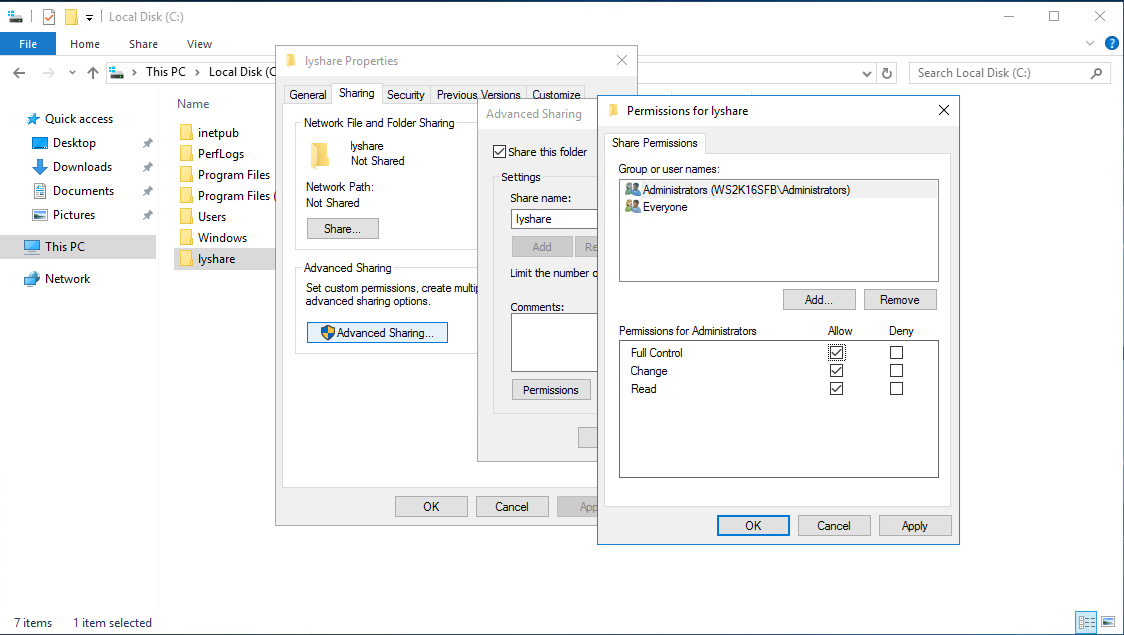
After the installation of Prerequisites, we need to create a share folder for the SFB Installation. Which can be created as of below:
Install administrative Tools:
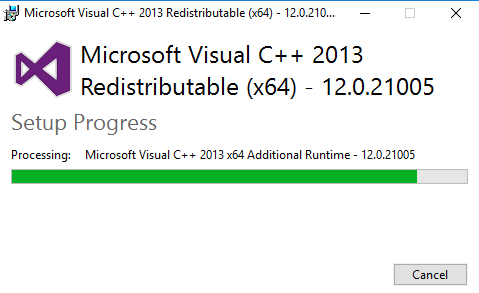
Now, after the creation of share folder. Mount the DVD of Skype for Business on your server and Execute the file. During the execution of the file, you can see ‘Microsoft Visual C++ 2013 Redistributable (x64’ getting installed.
Once this is installed, you can see now the installation process for the Skype for Business file. On which I have select ‘Don’t check for updates right now’ as I didn’t need any update right now and clicked on ‘Install’.
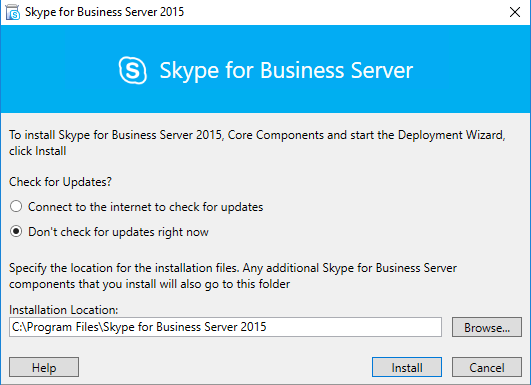
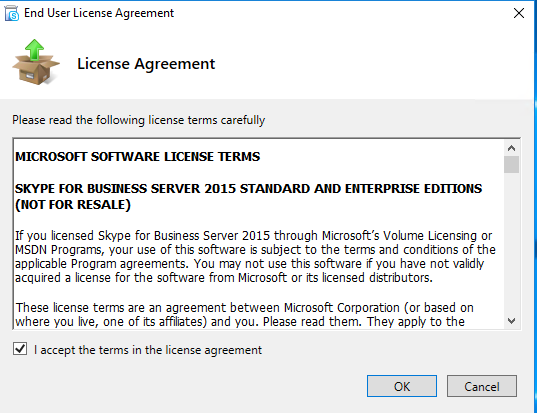
For the EULA agreement, check on ‘I accept the terms in the license agreement’ and click on ‘OK’.
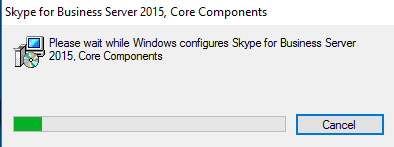
It will take few minutes to complete the installation of ‘Core Components’ of SFB.
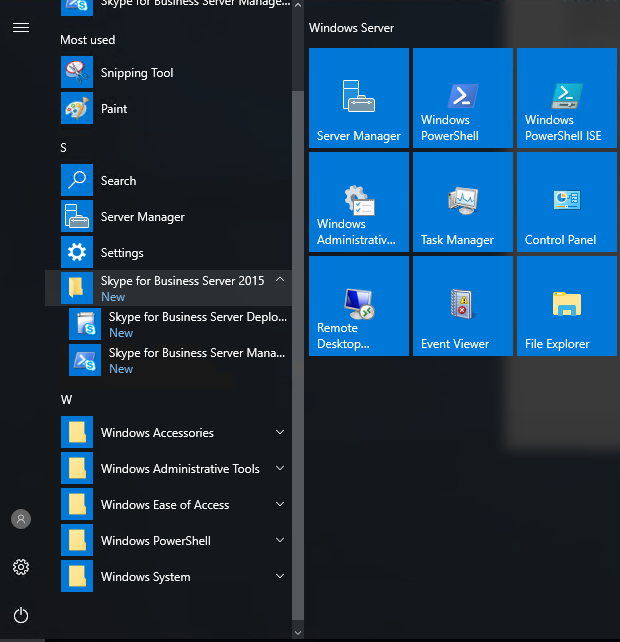
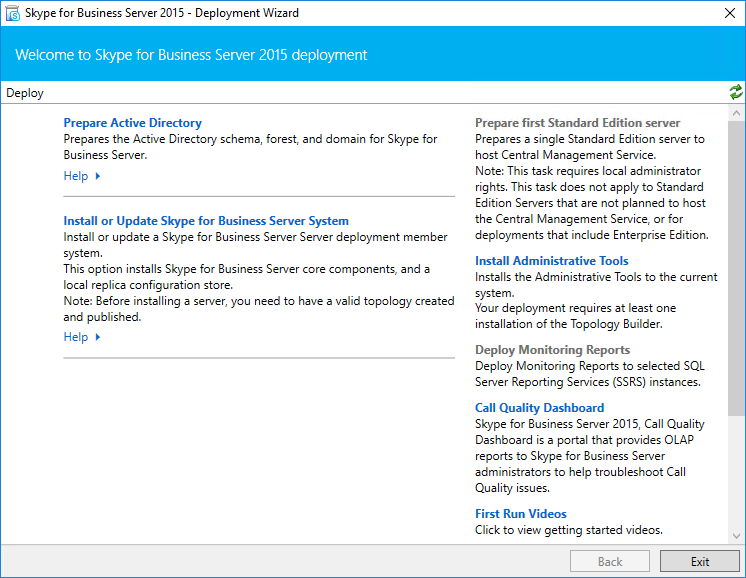
Once the core component installation is complete, you will see the ‘Deployment Wizard’. But if it didn’t get open, you can just go to your start and open ‘Skype for Business Server Deployment Tools’.
On Deployment Wizard, as this is new installation. We need to have Administrative tools to get installed. So, selected ‘Install Administrative Tools’.
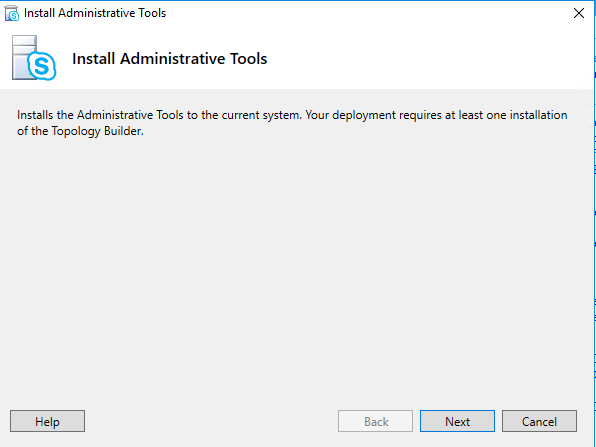
On the ‘Install Administrative Tools’, click ‘Next’ to install it.
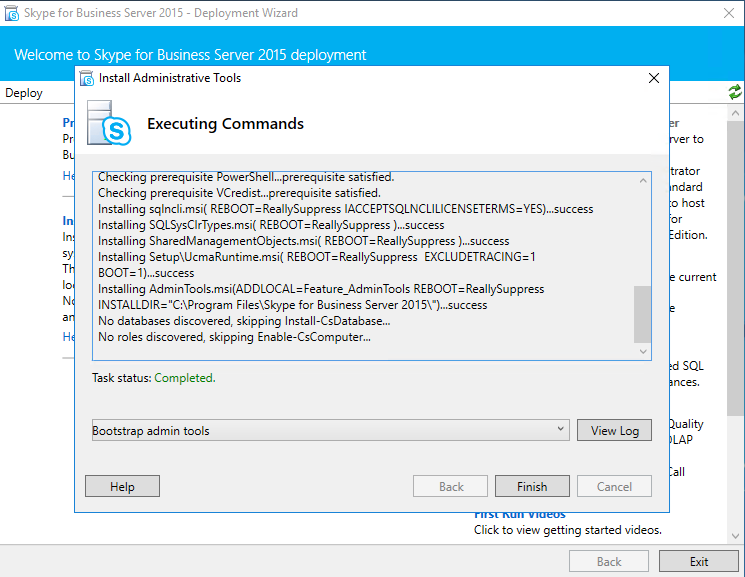
You can see a lot of process are checked and installed during the installation process, it might take 5-10 minutes depending upon the hardware specs of your server. After the completion of process, click on ‘Finish’.
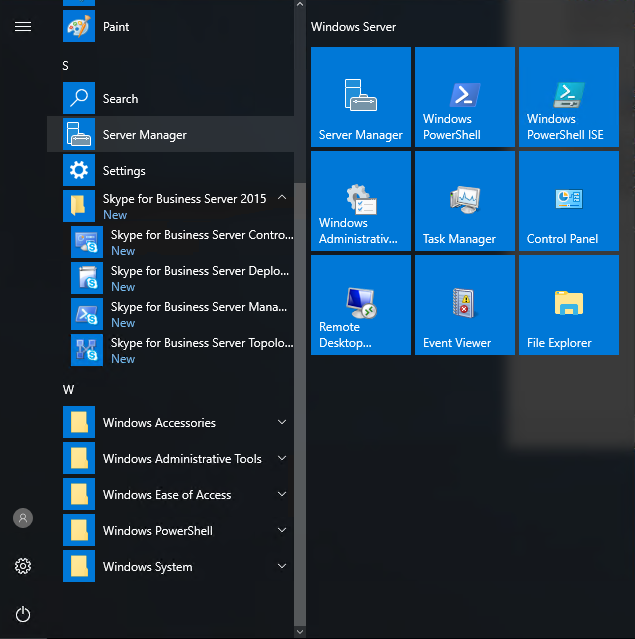
After the installation of Administrative tools, you can see few more tools getting appear on your machine start screen.
Prepare Active Directory:
After the installation of the Administrative Tools, now it is the turn of ‘Preparing Active Directory’. Click on the ‘Prepare Active Directory’.
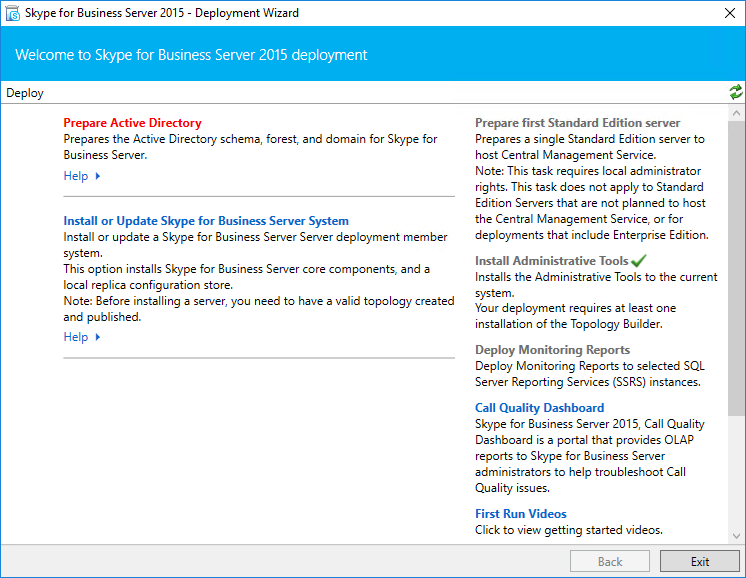
It will get drill down to ‘Active Directory Preparation’, on this screen click ‘Run’ for ‘Prepare Schema’.
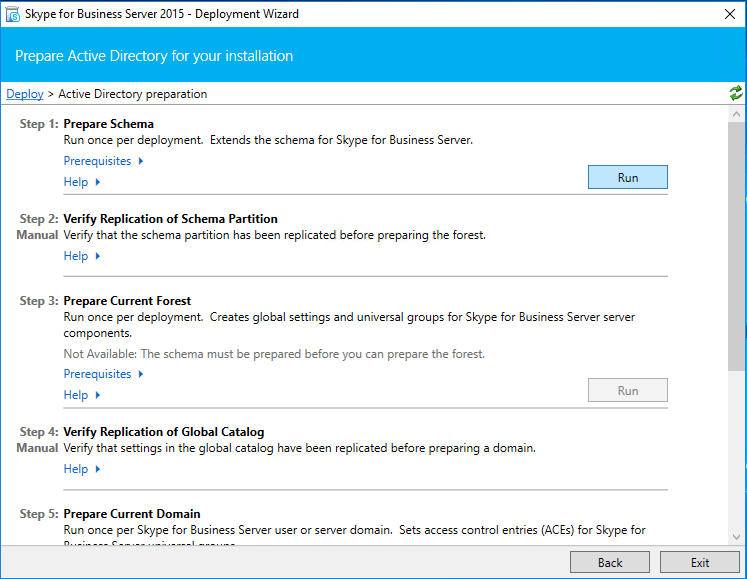
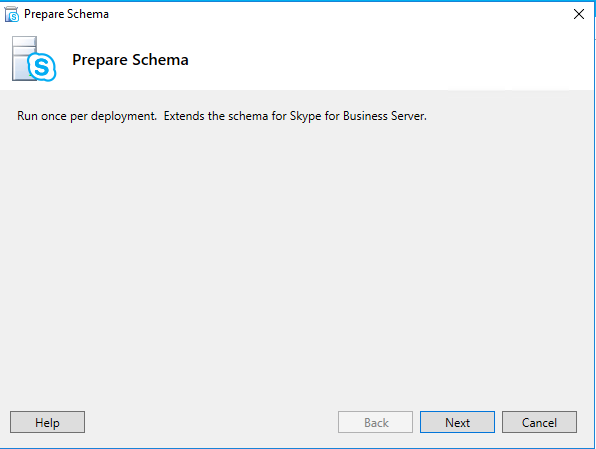
New window will get open to ‘Prepare Schema’, click on ‘Next’.
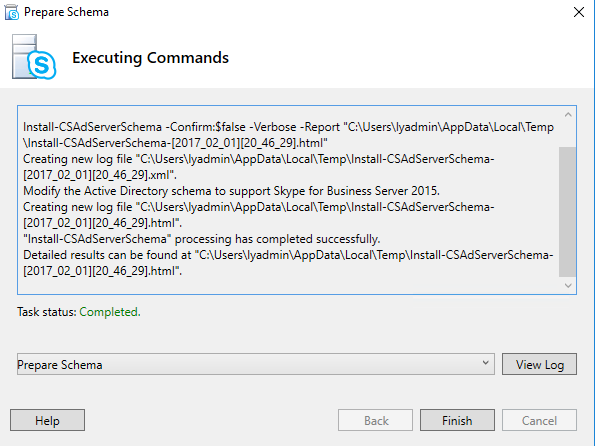
It will take a while to ‘Prepare Schema’, once this is done click on ‘Finish’.
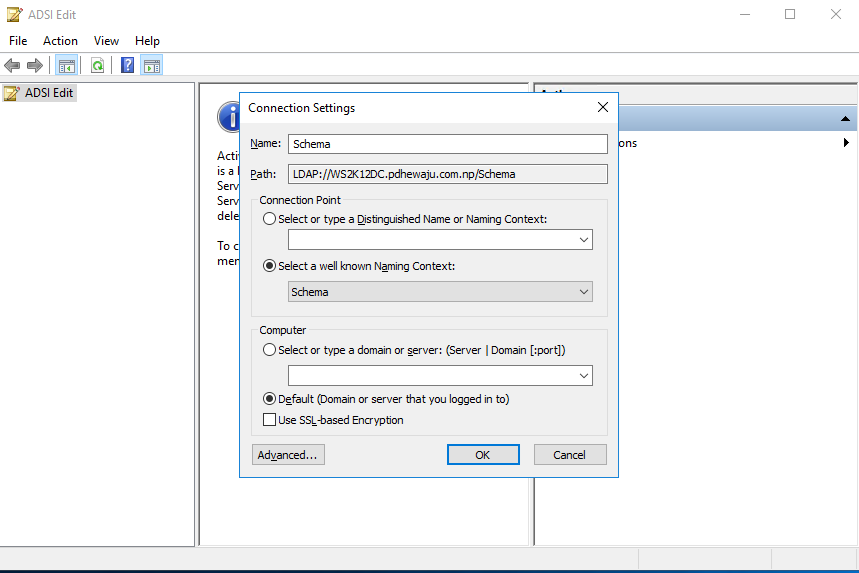
To verify the configuration of Schema, Go to Domain Controller. Open ‘ADSI Edit’ and connect with the below configuration.
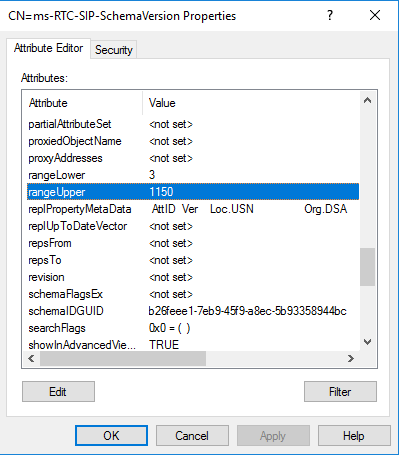
On the ‘Schema configuration’ go to the properties of ‘CN=ms-RTC-SIP-SchemaVersion Properties’ and verify the ‘rangeUpper’ to be ‘1150’.
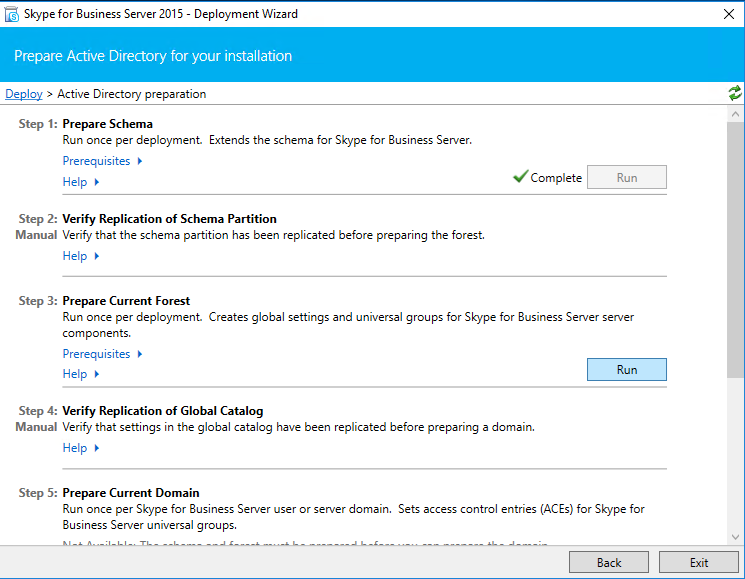
Now it’s time to ‘Prepare Current Forest’, so Click on ‘Run’.
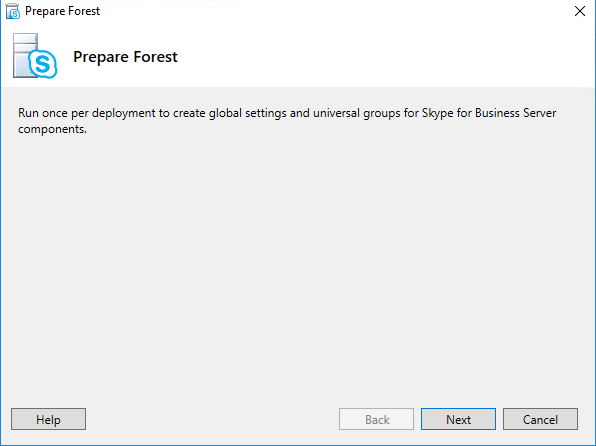
As earlier a new window will get open of ‘Prepare Forest’ click on ‘Next’.
Provide the domain name, if your domain name is different than local domain select ‘Domain FQDN’ and provide it and click on ‘Next’.
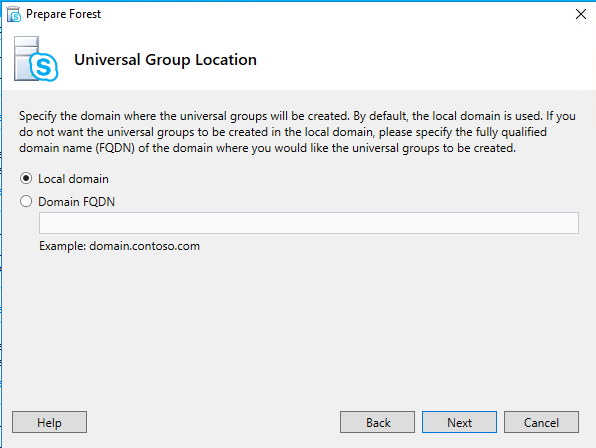
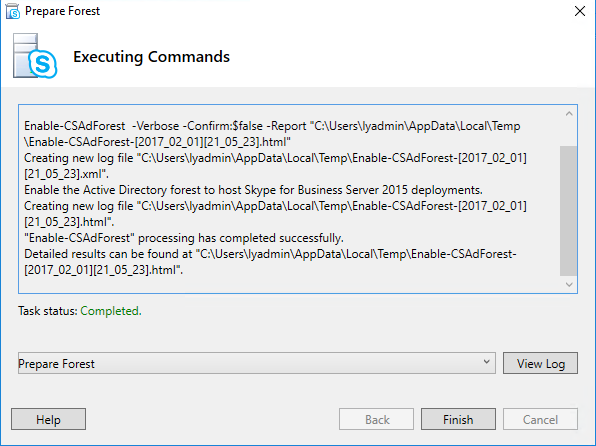
It will take while to configure this setting, once completed click on ‘Next’.
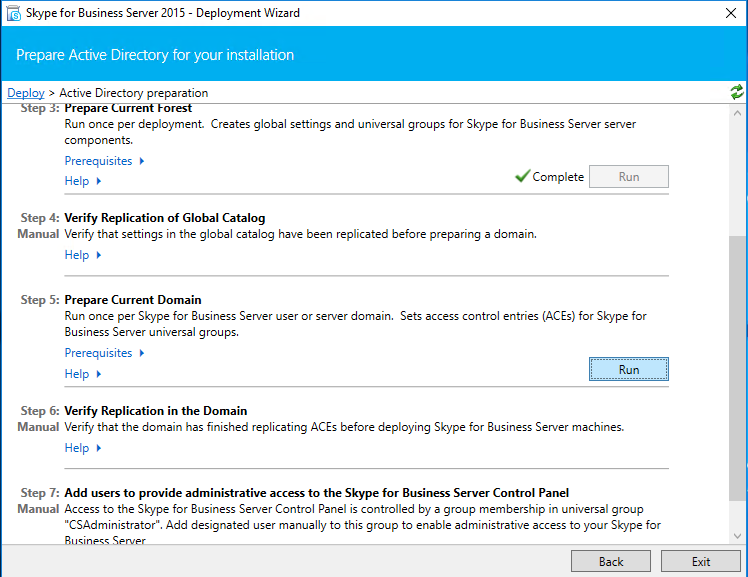
Again it’s time to ‘Prepare Current Domain’ so clicked on ‘Run’.
Similar new window for ‘Prepare Domain’ clicked on ‘Next’.
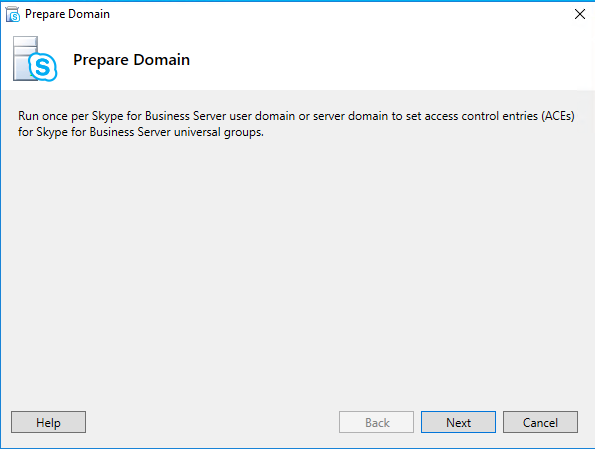
It will take while to complete, once complete click on ‘Finish’.
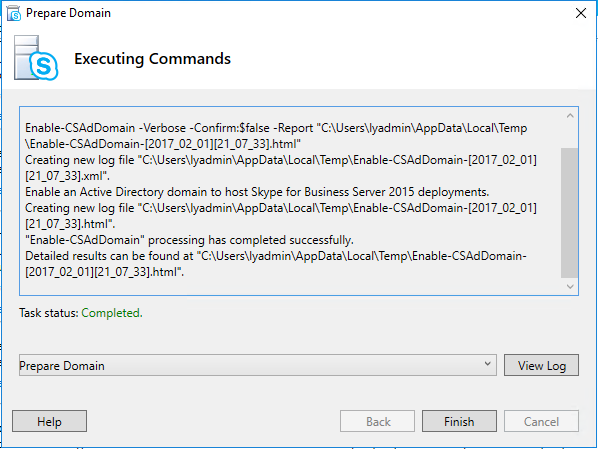
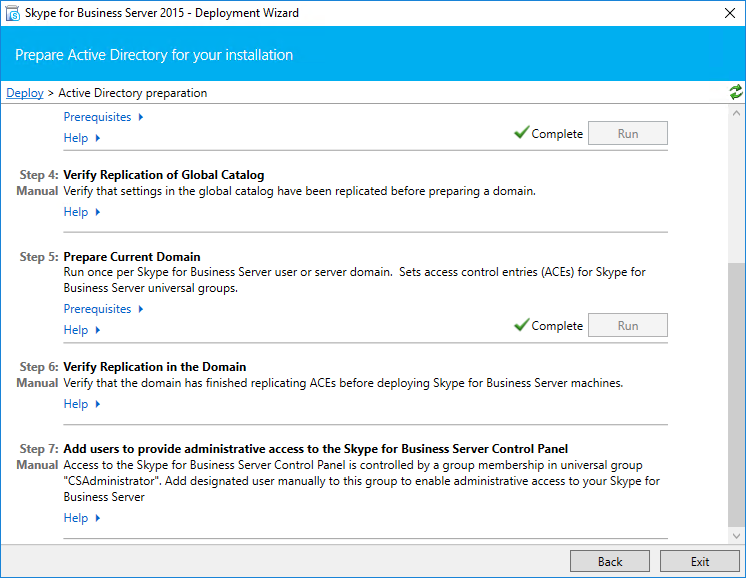
Now when ‘Prepare Active Directory’ is complete. We need to make change on the membership of SFB Admin user.
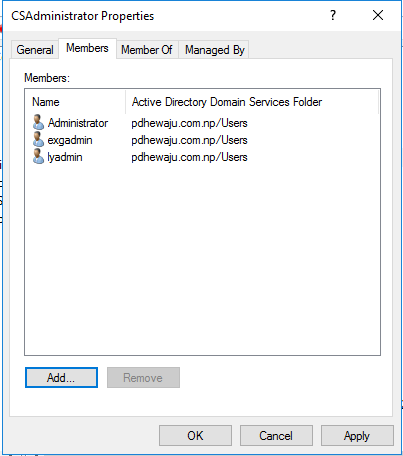
Here assigns the user as the ‘CSAdministrator’ whom you like to assign as SFB Administrators. Once done, click on ‘OK’.
Create DNS Records:
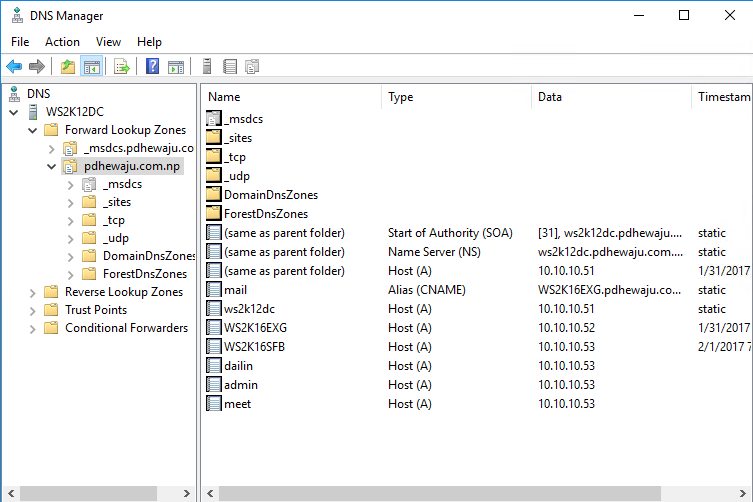
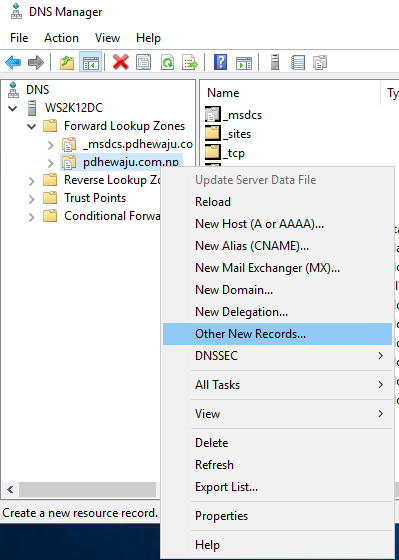
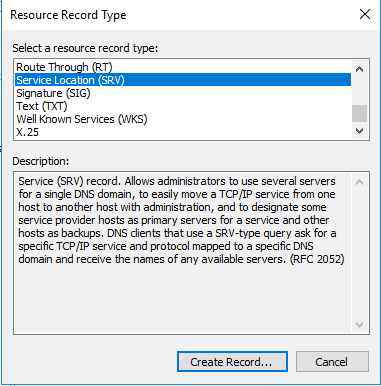
It’s time to create a DNS for the SFB communication, For SFB communication we need to create atleast 3 A Records. Here is the list that we will be requiring.
| Name | Type | Data |
| Dailin.<domain FQDN> | A Record | IP of SFB Server |
| Admin.<domain FQDN> | A Record | IP of SFB Server |
| Meet.<domain FQDN> | A Record | IP of SFB Server |
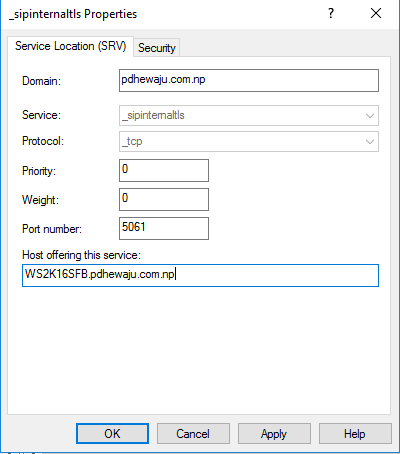
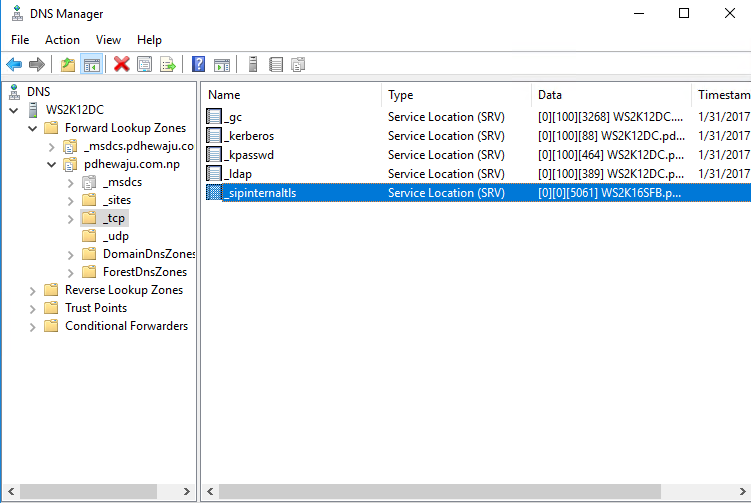
| _sipinternaltls | SRV Record | Protocal: _tls Port Number: 5061 Host Offering this service: SFB FQDN |
Prepare First Standard Edition Server
If you are going to install Standalone server, you require to run this step. But if you are going to install Enterprise Edition or Farm Structure, you can skip this step.
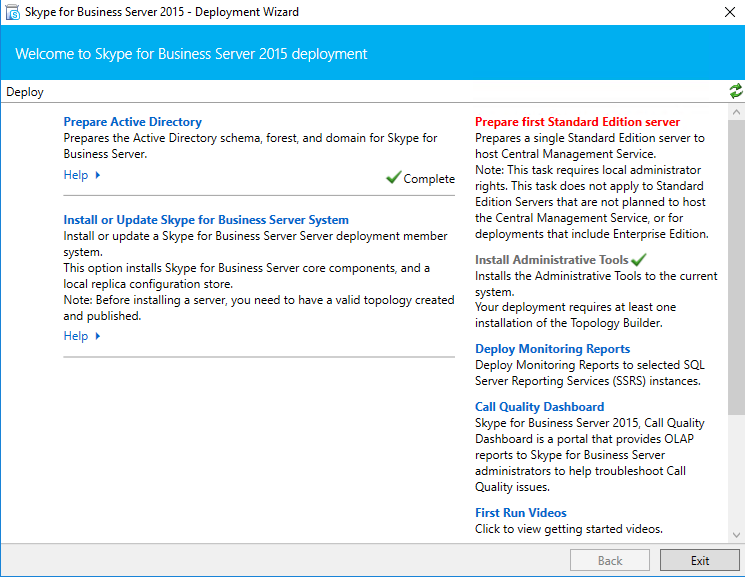
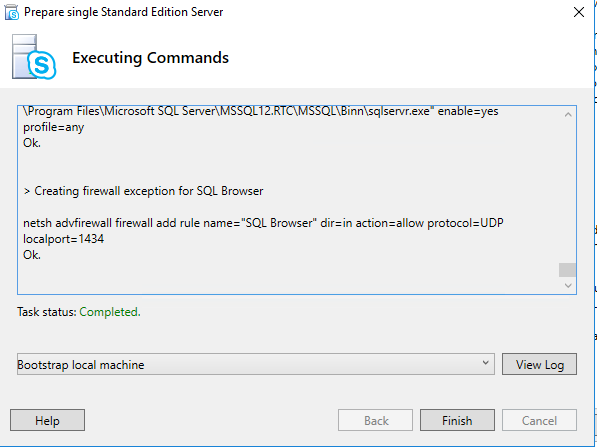
This process actually install the SQL Express 2014 on your server, as SFB needs database to be get configure. It will take around 15-30 minutes, once complete click on ‘Finish’.
Topology Building:
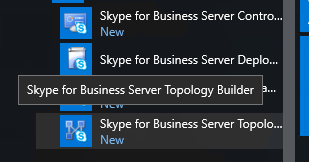
Now it’s time to build out Topology for SFB 2015. To build Topology, go to start and open ‘Skype for Business Server Topology Builder’.
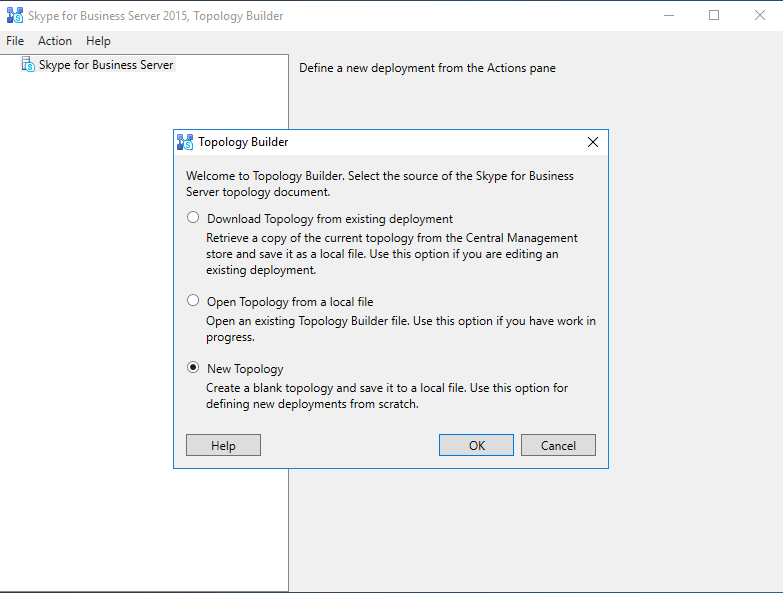
On the ‘Topology Builder’ select ‘New Topology’ and click ‘OK’.
On the new topology, provide your sip domain and click on ‘Next’.
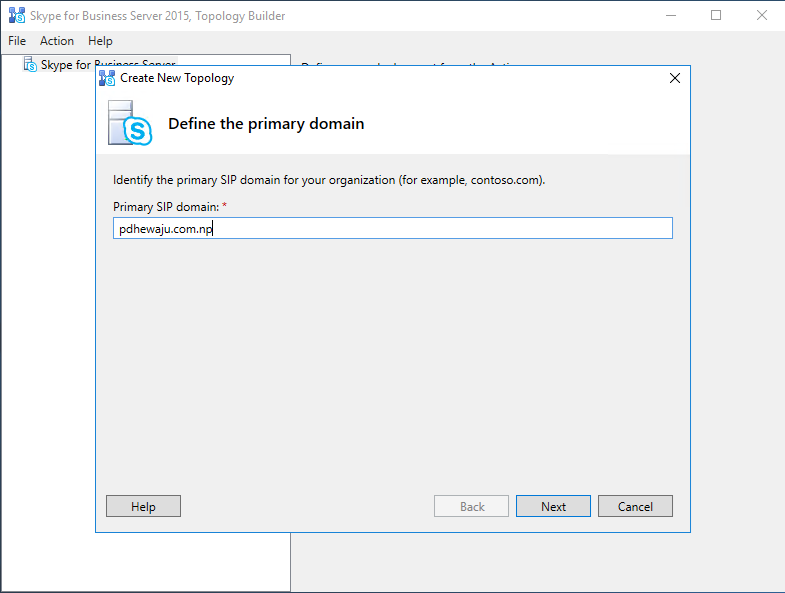
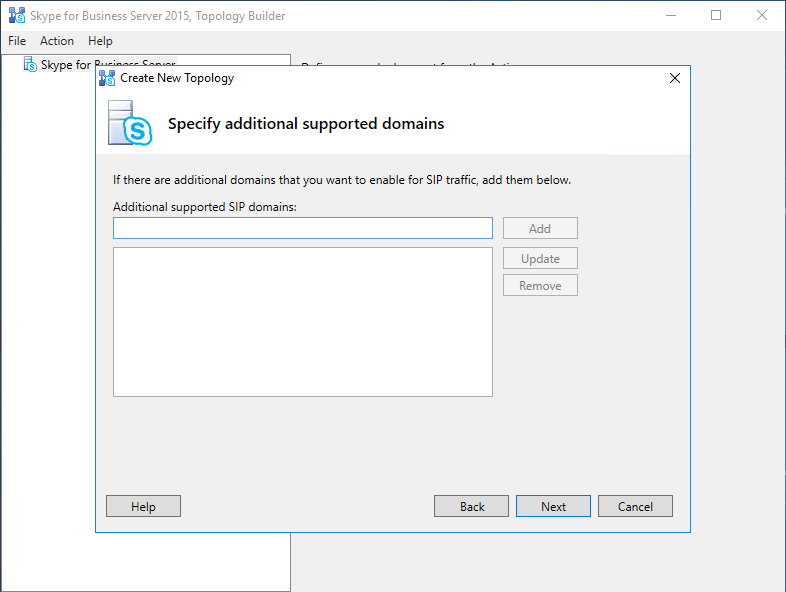
If there is any additional SIP, you can add over here. If not you can skip it by clicking on ‘Next’.
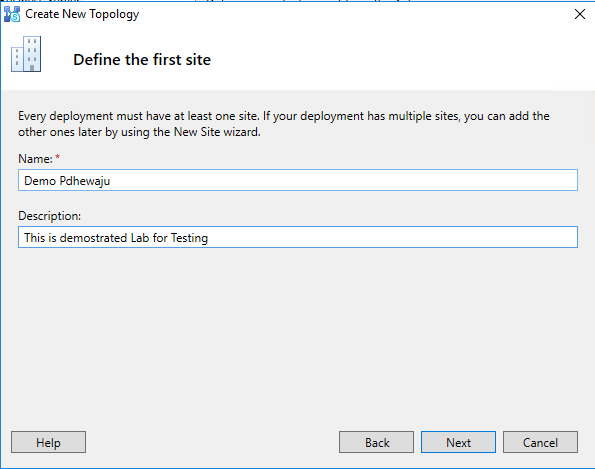
On the ‘Define the first site’ provide the ‘Name’ and ‘Description’ and click on ‘Next’.
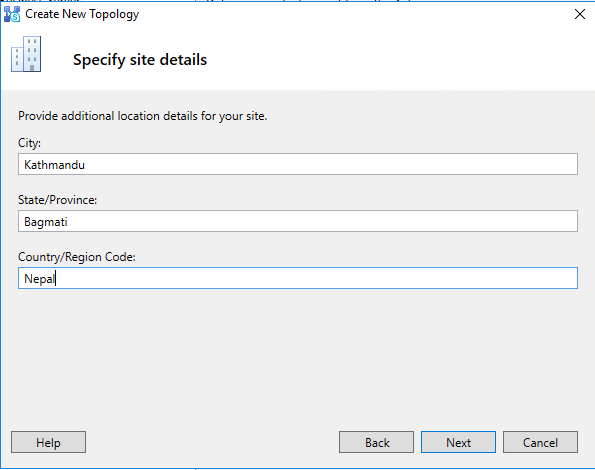
On the ‘Specify site details’ provide ‘City’, ‘State/Province’ and ‘Country/Region Code’.
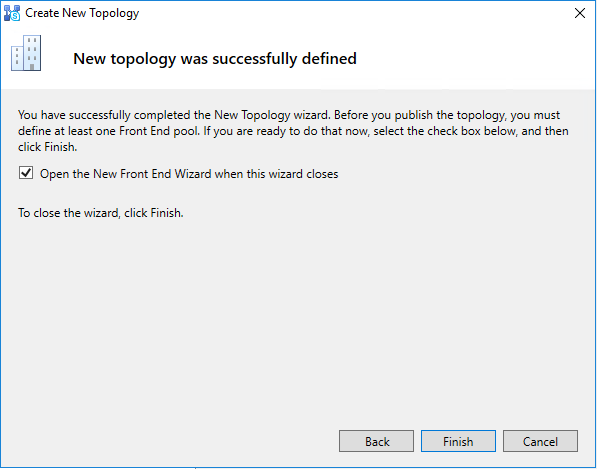
In ‘New topology was successfully defined’ check ‘open the New Front End Wizard when this wizard closes’ and click on ‘Finish’.
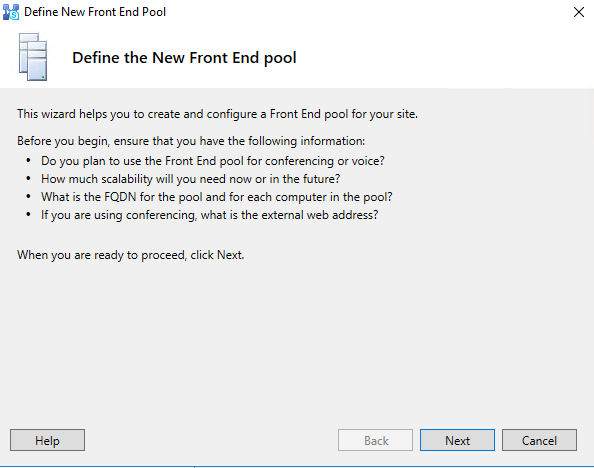
On ‘Define the New Front End Pool’ and click on ‘Next’.
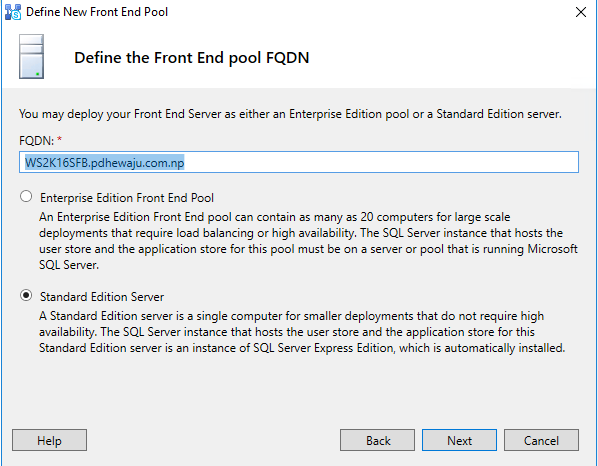
On ‘Define the Front-End Pool FQDN’ provide ‘FQDN’, as of mine is standalone. Selected ‘Standalone’, but if it is enterprise you need provide the name of pool.
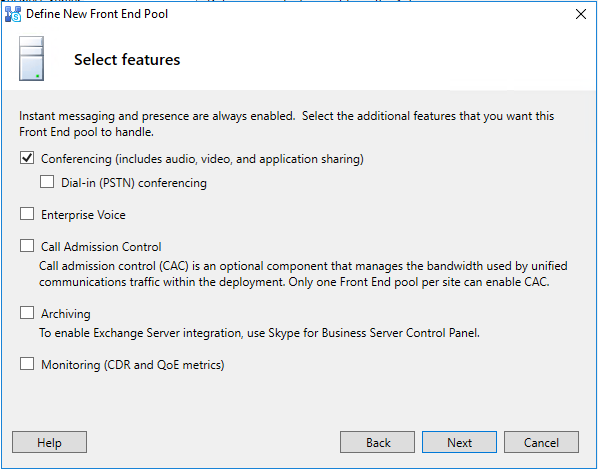
On ‘Select Features’, select the features you will required to install. For me I selected ‘Conferencing’ and click on ‘Next’.
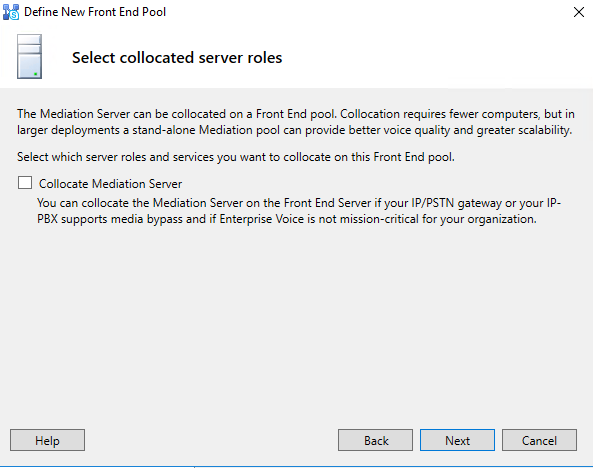
On ‘Select collocated server roles’ skipped it and clicked on ‘Next’ as I don’t need it for my standalone installation.
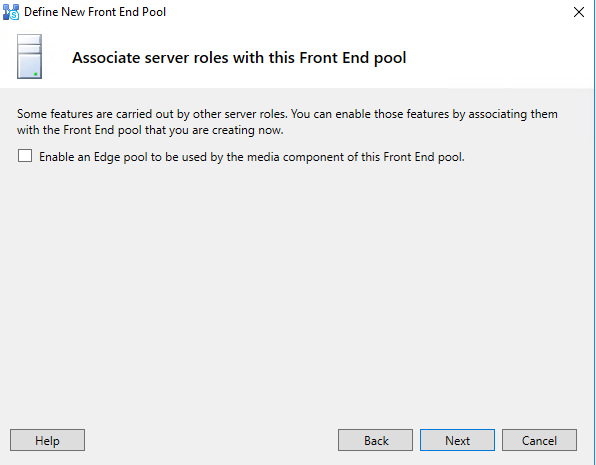
As I don’t have any Edge pool or mediation servers skipped it clicked on ‘Next’.
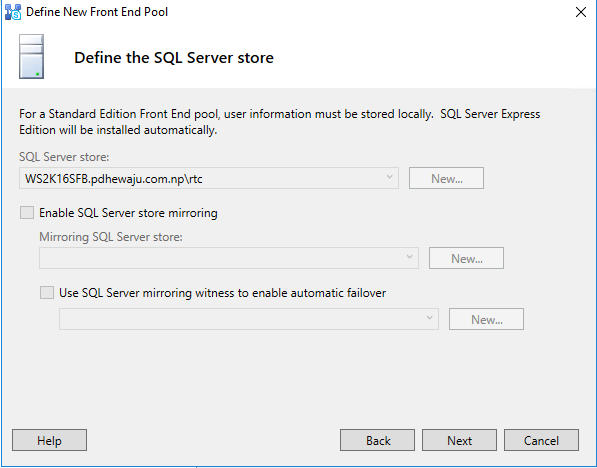
On ‘Define the SQL Server store’ I do have SQL Server Express and click on ‘Next’.
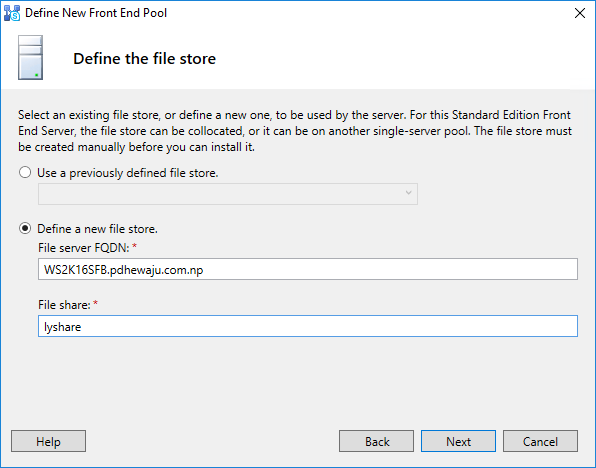
On ‘Define the file store’ provide the name of share folder that we had created earlier and click on ‘Next’.
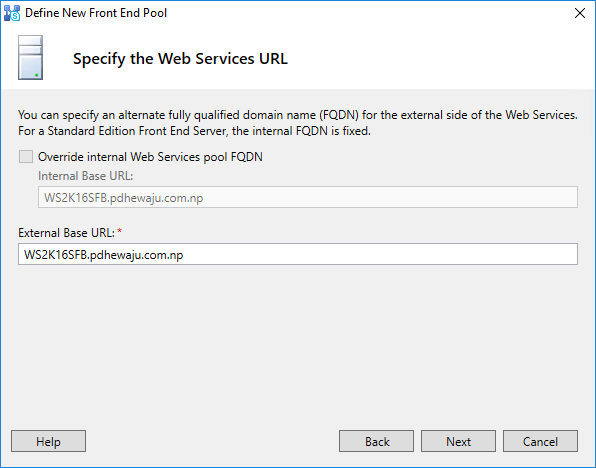
On ‘Specify the web services URL’ provider the ‘External Base URL’ and click on ‘Next’.
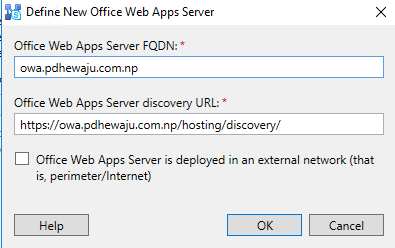
If you do have OWA server or Office online server, provide the FQDN of it. This is required for the sharing of word document as well the ppt slides and OneNote through SFB.
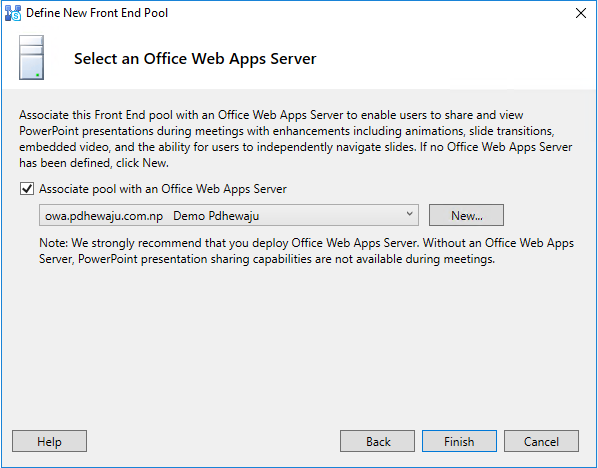
Once this is done click on ‘Finish’.
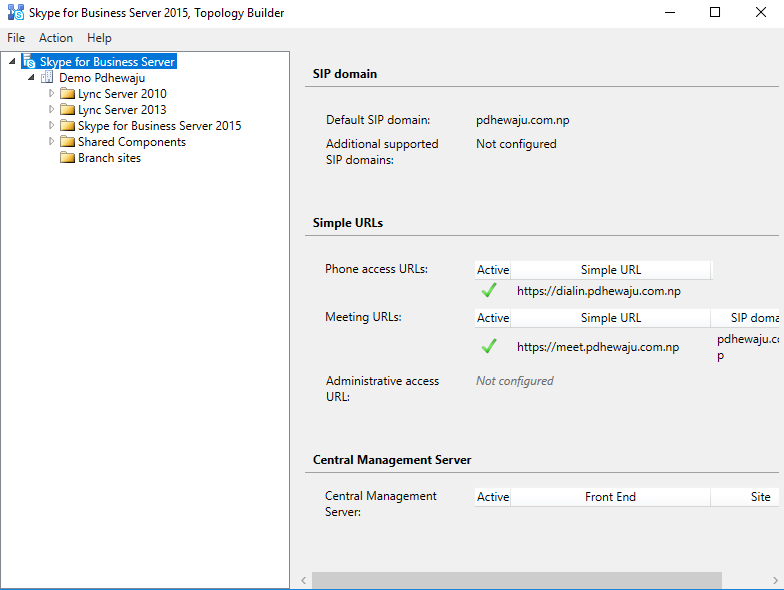
Once the configuration is finish, you can see the file on the topology Builder.
On the SFB server right click on edit properties.
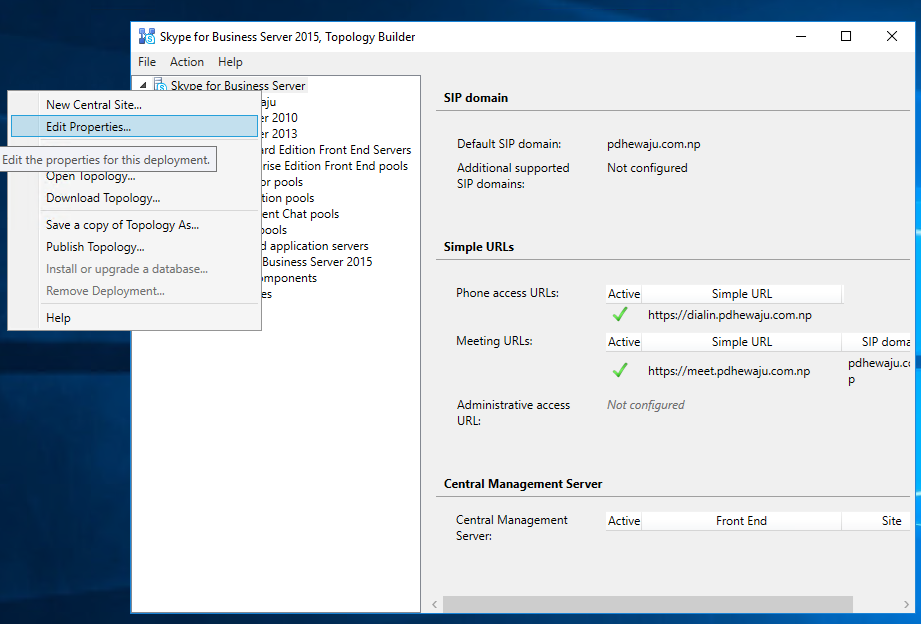
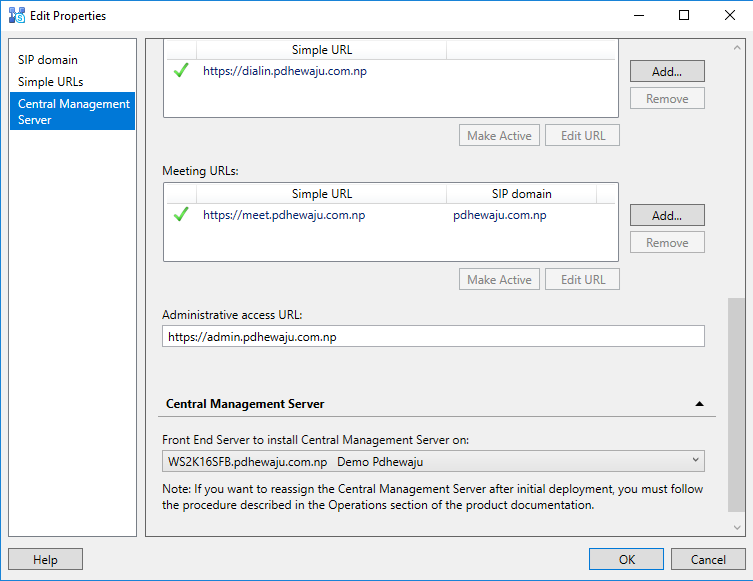
These properties are edited to check the admin panel and configure the Central Management server, once this is done click on ‘OK’.
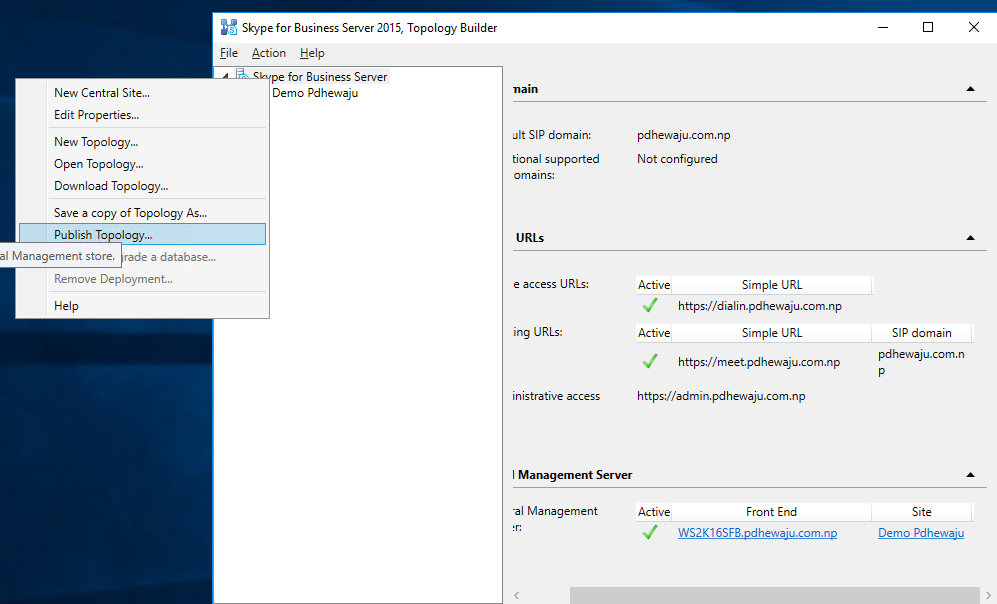
Now it is time to publish the topology, so right click on it and select on ‘Publish Topology’.
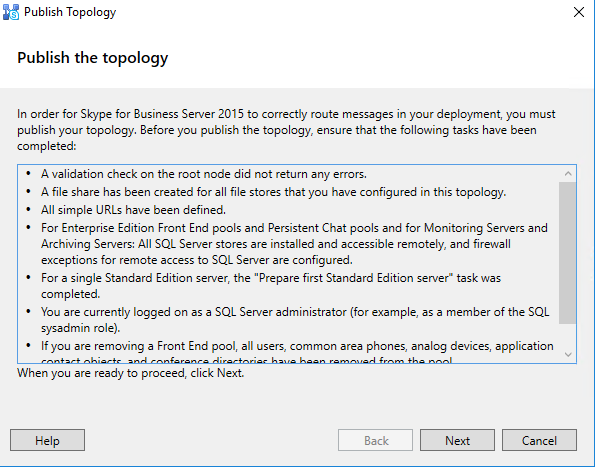
To Publish the topology, a new window will get open, click on ‘Next’ on ‘Publish the Topology’ screen.
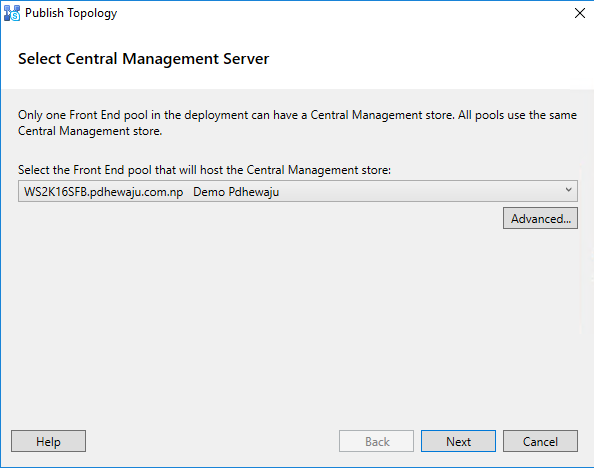
On ‘Select Central Management Server’ provide the name and click on ‘Next’.
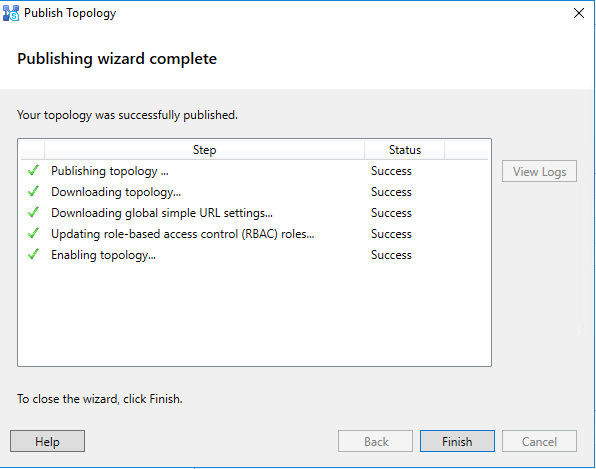
It will take few minutes to complete the configuration, once this is done click on ‘Finish’.
Install or update Skype for Business Server System:
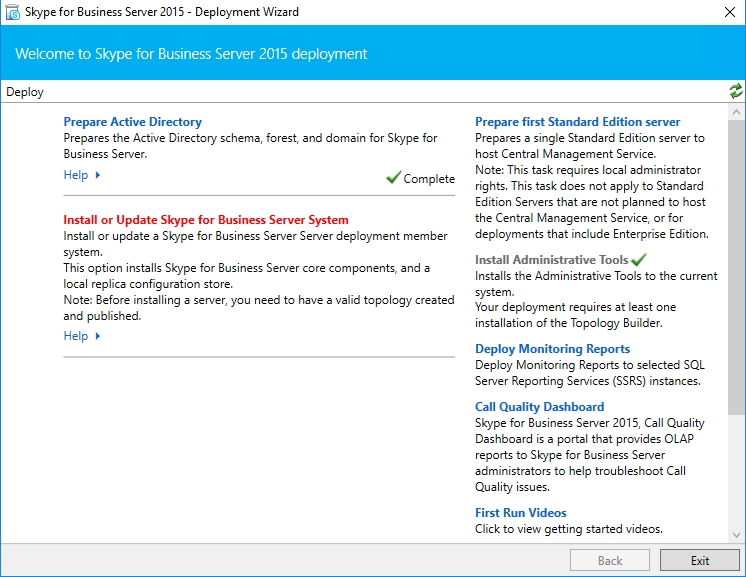
It time to ‘Install or update Skype for Business server system’ we have already build the Topology and configured the setting. Now it’s time to install, so click on ‘Install or Update Skype for Business Server System’.
To proceed ahead, click ‘Run’ for ‘Install Local Configuration Store’.
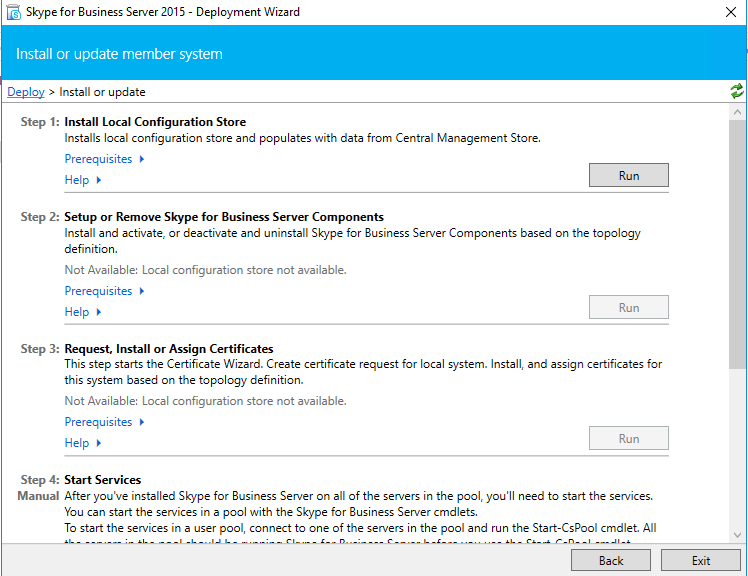
On ‘Install Local Configuration Store’, as this is my new one selected ‘Retrieve directly from the Central Management Store’ and clicked on ‘Next’.
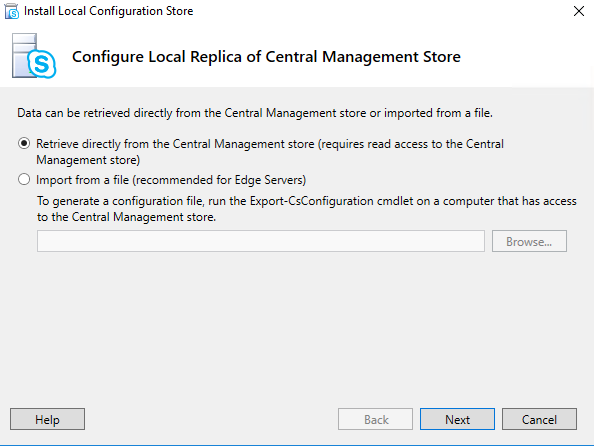
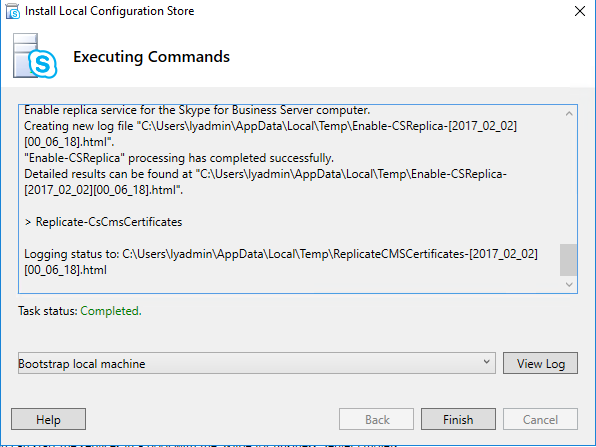
The process takes while, once this is finish click on ‘Finish’.
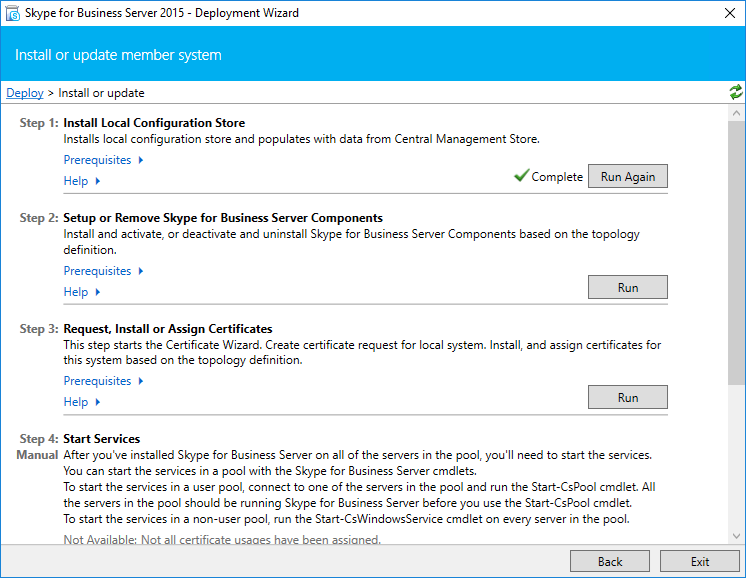
After the installation of ‘Install Local Configuration Store’ now it’s time to get setup so click ‘Run’ on ‘Setup or Remove Skype for Business Server Components’.
On ‘Set Up Skype for Business Server Components’ click on ‘Next’.
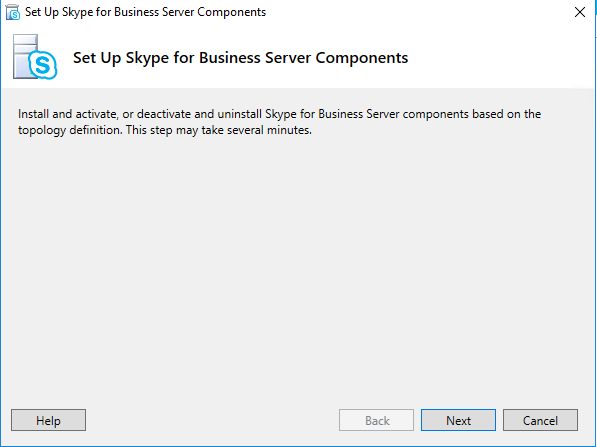
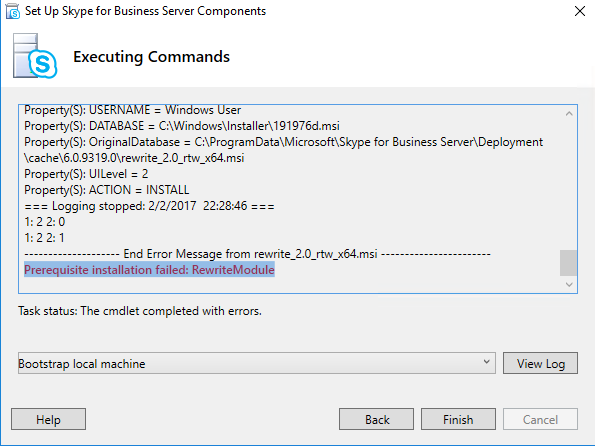
During the installation of ‘Set Up Skype for Business Server Components’ you might be getting error ‘Prerequisite Installation failed: RewriteModule’ to get this solve, please visit the this blog with the solution. Here I have mentioned, why this issue gets popup and how to solve this.
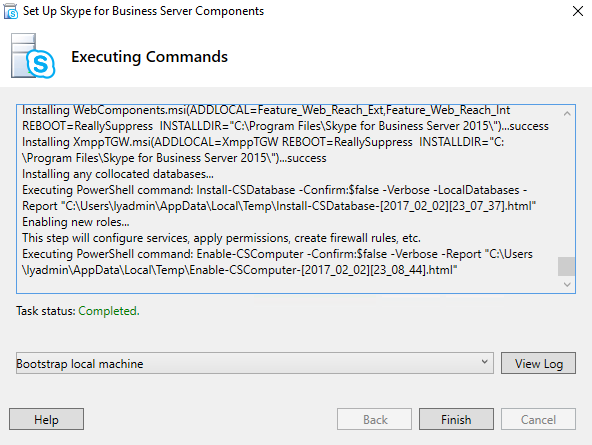
It will take few minutes to get complete this installation, once installation is finish click on ‘Finish’.
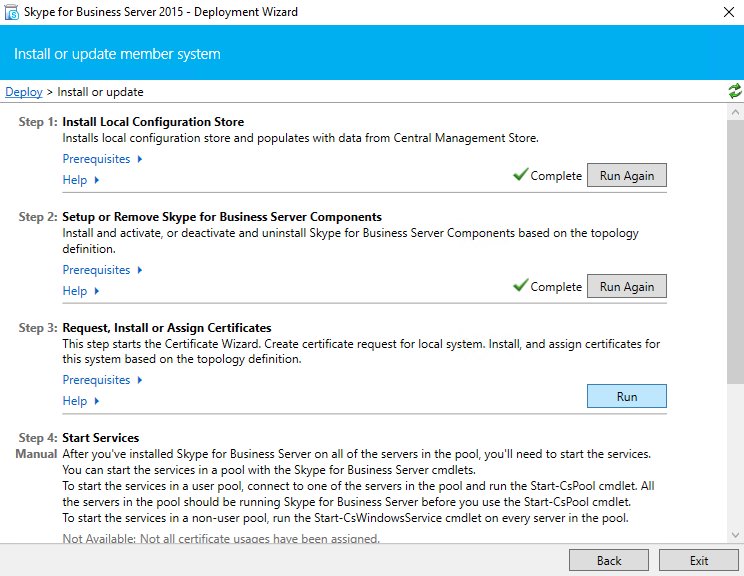
Now it’s time to assign the Certificates. The certificates can be public SSL or Private, for the demo purpose I am using Private Certificate. If you want to configure Public SSL, you need to request certificate from this same place. So click on ‘Run’ to request and assign new certificate to SFB.
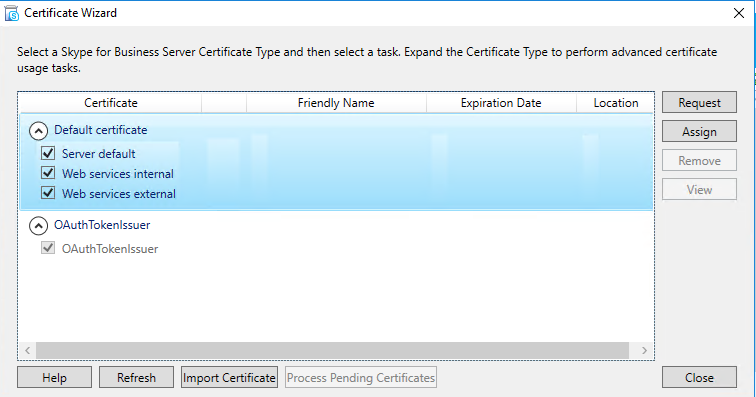
On ‘Certificate Wizard’ select the certificate you require and click on ‘Request’.
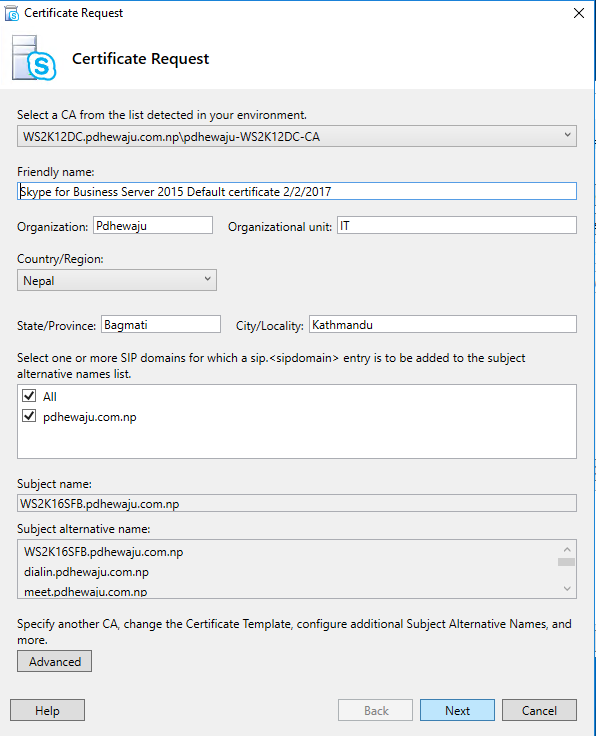
On ‘Certificate Request’ provide the detail and click on ‘Next’.
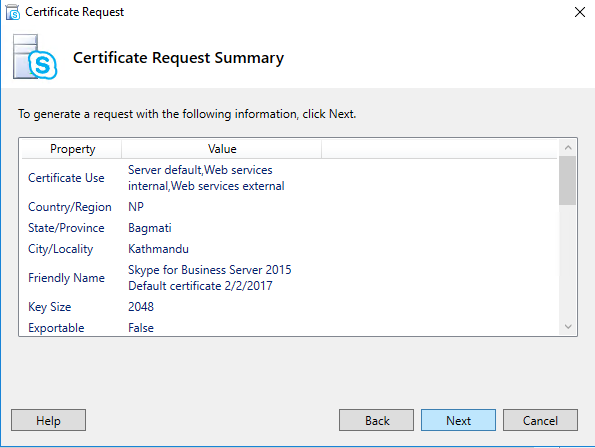
On ‘Certificate Request Summary’ check the configuration and click on ‘Next’.
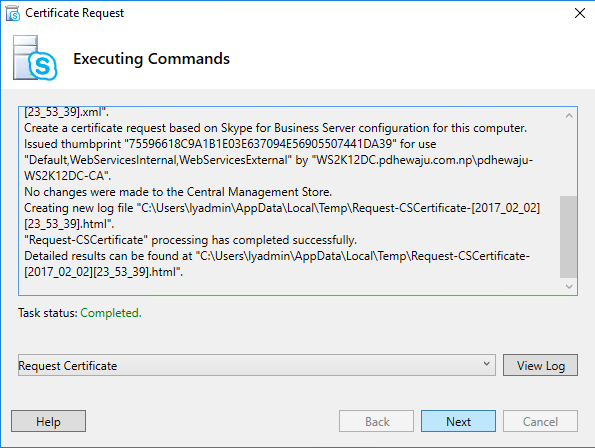
After the configuration, on ‘executing commands’ window click on Next to request certificate.
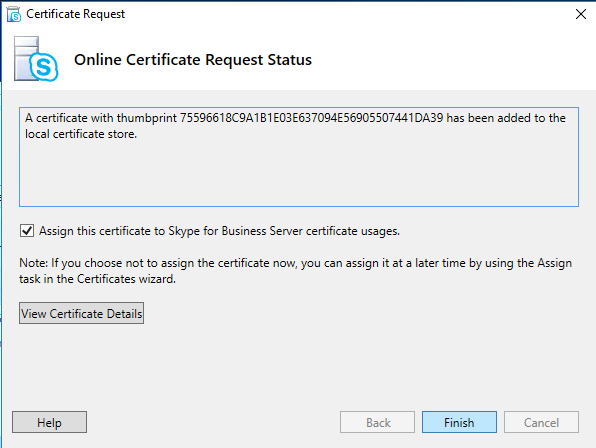
On ‘Online Certificate Request Status’ check ‘Assign this certificate to Skype for Business Server Certificate usages’ and click on ‘Finish’.
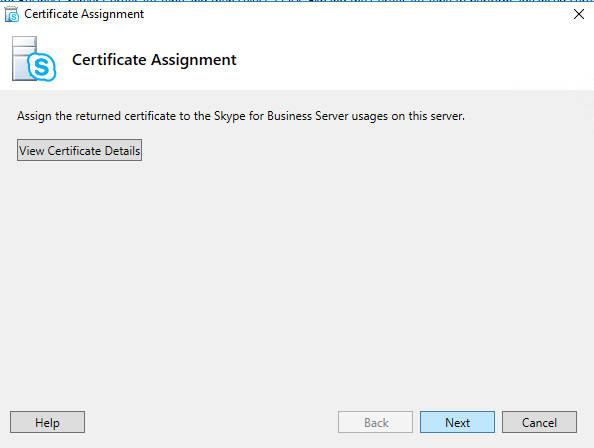
On ‘Certificate Assignment’ click on ‘Next’.
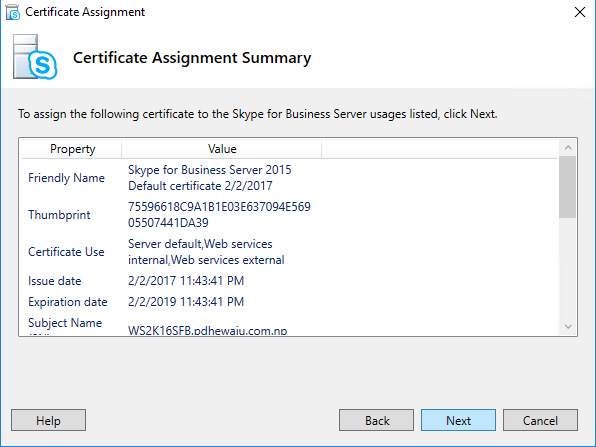
On ‘Certificate Assignment Summary’ check whether the certificate is good or not and click ‘Next’.
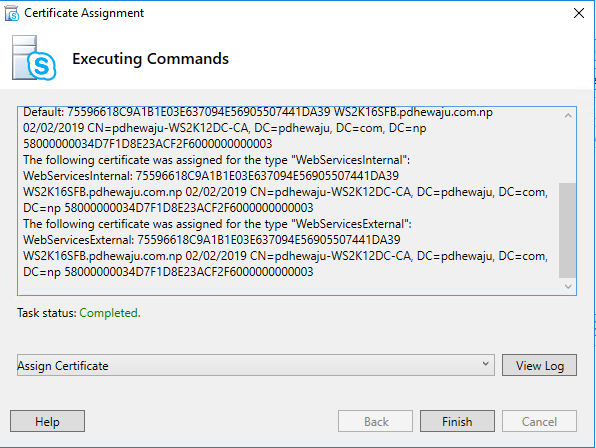
After assigning certificate click on ‘Finish’.
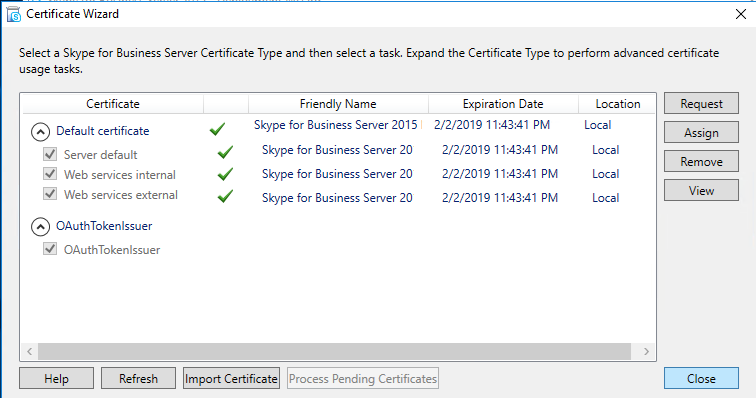
After the assignment of the certificate click on ‘Close’.
Now it’s time to start the SFB Services, to start the services use PowerShell command.
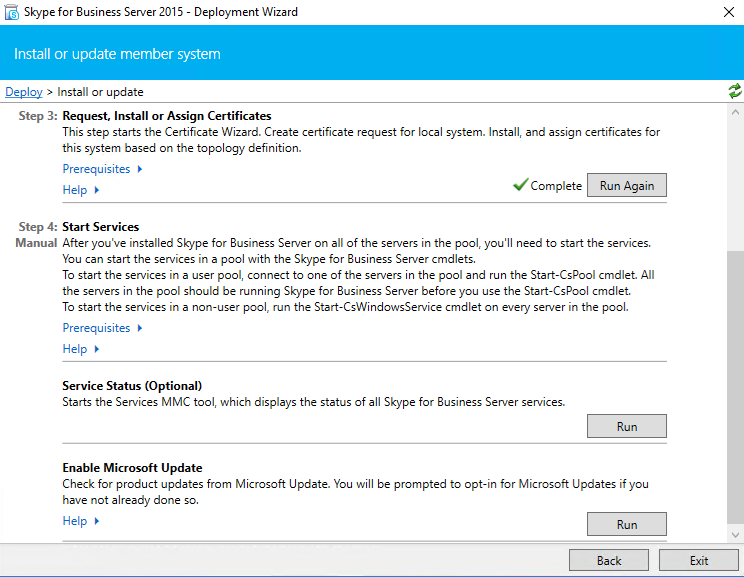
Open PowerShell using ‘Run as Administrator’ and execute below cmdlet.
C:\Users\lyadmin>Start-CsWindowsService

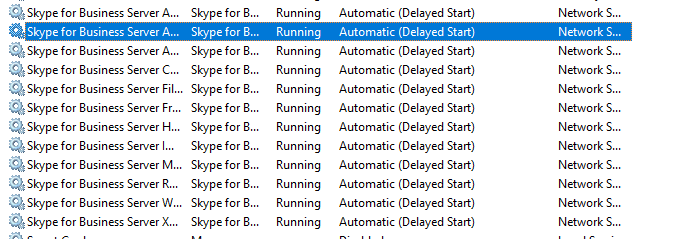
After executing this cmdlet, you can see all the services related to SFB is started.
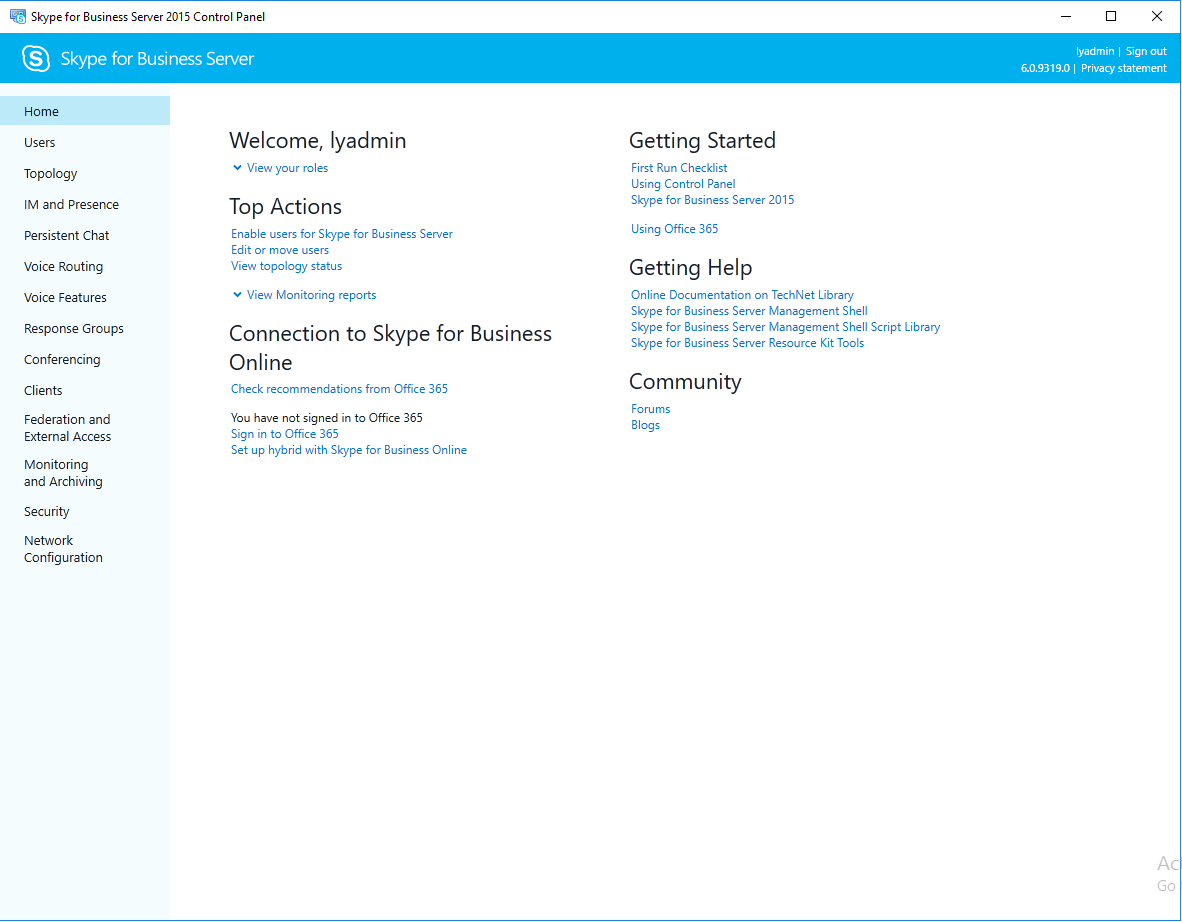
After the service start your configuration is finish, you can just open the SFB control panel and check the status. Below is the snapshot of SFB Control Panel
Testing:
I just wanted to check that if my user gets login on the SFB client or not just to verify my configuration. So added 2 users from ‘Users’ menu.
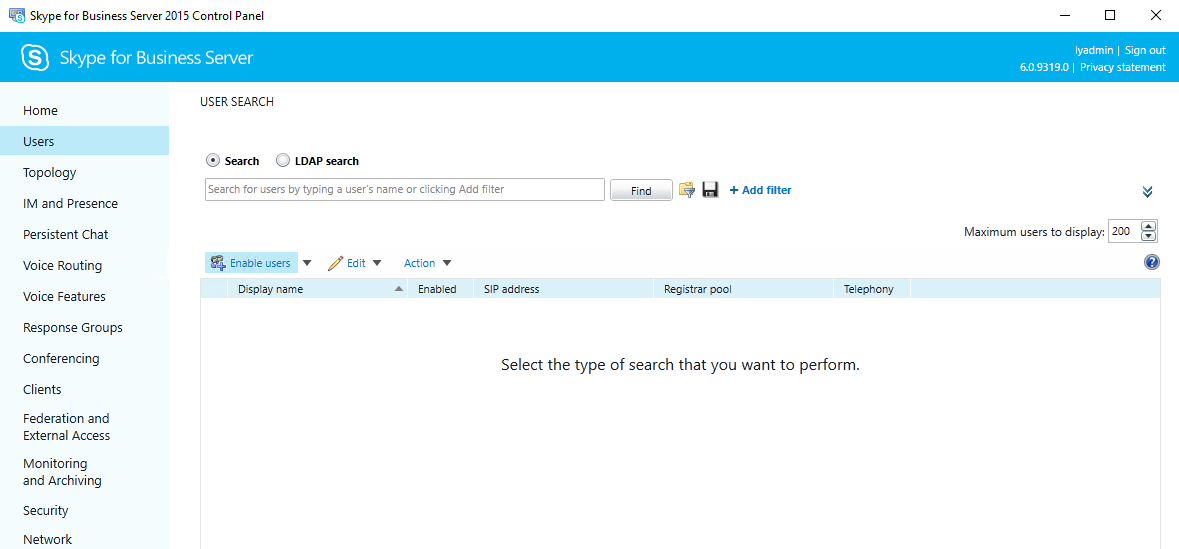
Added user with assigning to the pool and login with UPN.
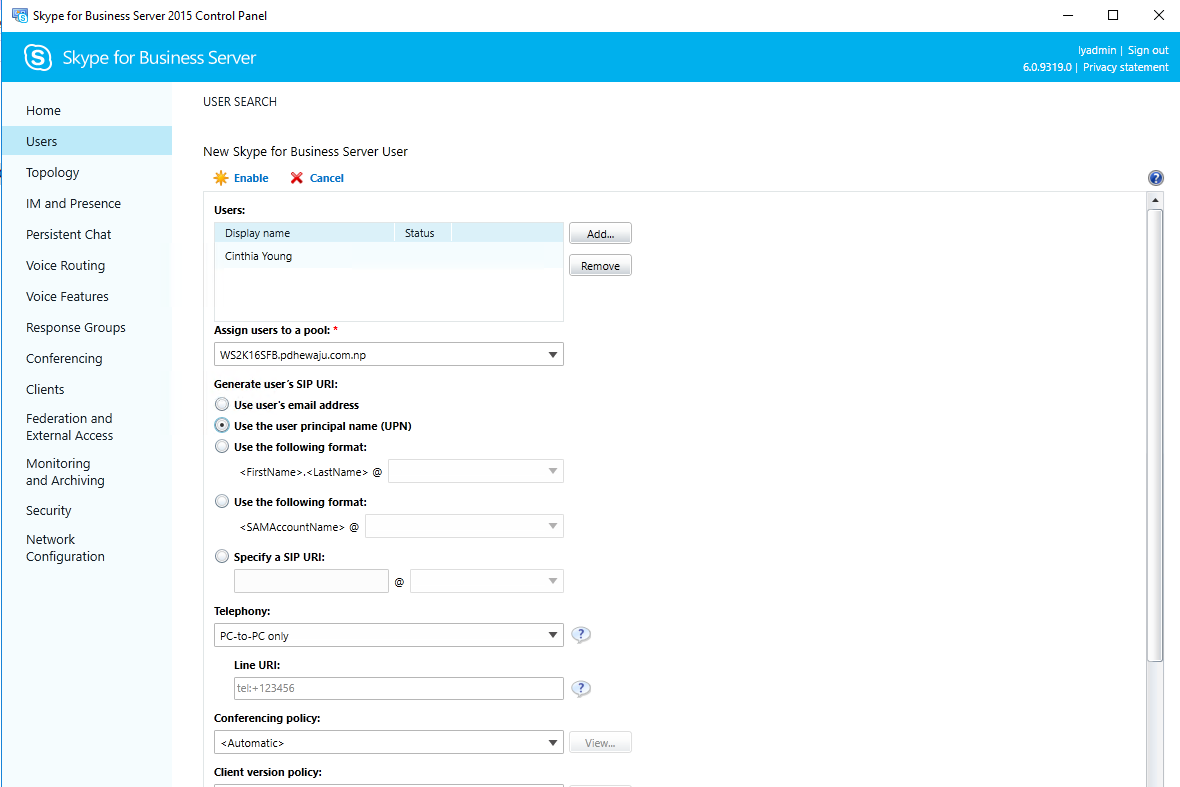
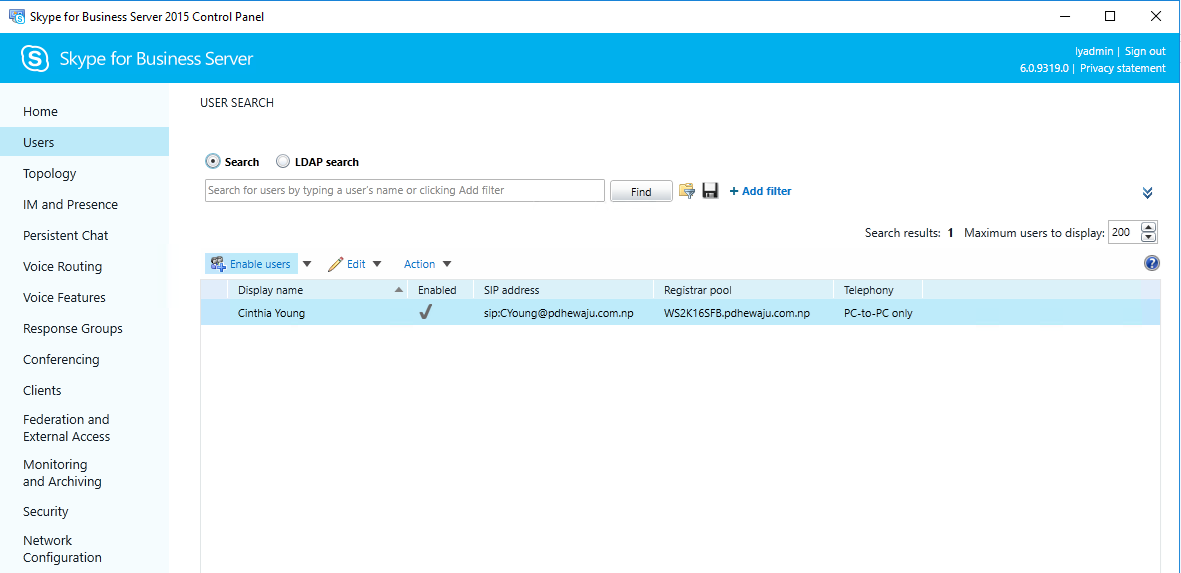
Once the user is created, you can see the detail of user on the SFB control Panel.
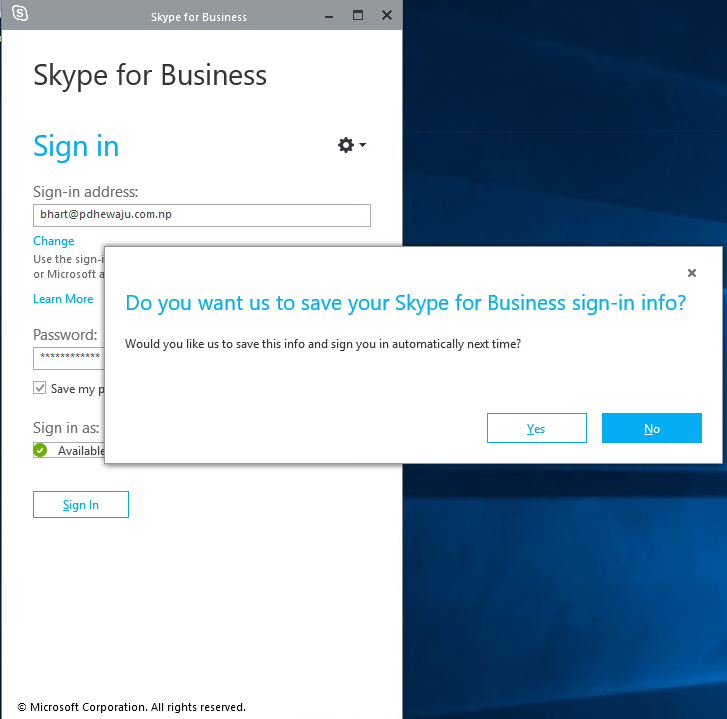
Now it’s time to check, so I logged on to one of my user on the machine to check the availability of the users.
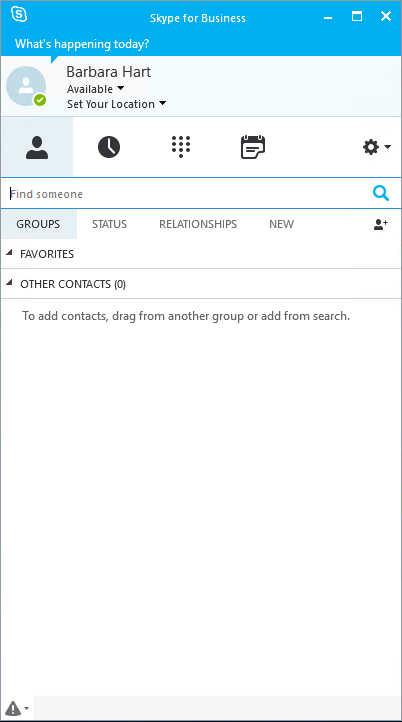
And yes… the user is ON.
This is the configuration part of standalone SFB. I hope this was good and helpful to you guys. Hoping to get your comments on this. Thank you


How do you install CAL Licenses for Skype for Business Server 2015
Hi Samuel,
There is no place you need to install CAL license for Skype for Business… it’s just a server license as like of other product.
Iam not able to use the Desktop Sharing and Audio Features without having these CAL Licenses in place. Its an inhouse Skype for Business 2015 install.
can you share the error with us?
Network Connectivity Issues are preventing using Desktop Sharing
Hi Samuel,
Can you check the Firewall port between Client machines and Front End Pool???
I hope this link can help you to understand on better way.
https://technet.microsoft.com/en-us/library/dn594589.aspx
We needed to add web-asp-net separately using:
Add-WindowsFeature Web-Asp-Net -Source D:\sources\sxs\
Yes, if required we can.. 🙂 and the source drive should be our operating system Image mounted drive. i.e. if we have mounted our OS on Drive E: than it should be like -source e:\Sources\sxs\
Anyway thank you for your comment Fred. 🙂
Hi Prashant, i am integrating Polycom Clariti and SfB, 1st i need to lock the Virtual Meeting Rooms NUMARIC format in SfB (auto generation is alpha-numraic) secondly i need to put email footer which can show the IP address and other info for NON-SfB users.
Hi Muhammad,
I need to check on that…. email footer is possible but for locking virtual meeting rooms need to check.
Dear,
I have successfully configured the skype but skype for business not working without internet on the local machine. I have deployed the sky for business locally.
Do you have configure this domain for office 365??
when try to connect from lync client nothing happen
i try and run this command and the result is here
what should i do?
its skype 2019
PS C:\Users\Administrator.PRI> Test-CsClientAuth -TargetFqdn http://srv-skype.pri.local -UserSipAddress alie@pri.local -TargetUri http://srv-skype.pri.local
cmdlet Test-CsClientAuthentication at command pipeline position 1
Supply values for the following parameters:
UserCredential
Target Fqdn : http://srv-skype.pri.local
Target Uri : http://srv-skype.pri.local
Result : Failure
Latency : 00:00:00
Error Message : No response received for Web-Ticket service.
Inner Exception:The remote server returned an unexpected response: (405) Method Not Allowed.
Inner Exception:The remote server returned an error: (405) Method Not Allowed.
Diagnosis :
Inner Diagnosis:Allow : GET, HEAD, OPTIONS, TRACE
Content-Length : 5324
Cache-Control : private
Content-Type : text/html; charset=utf-8
Date : Thu, 17 Jan 2019 09:18:14 GMT
Server : Microsoft-IIS/10.0
hi
when try to connect from lync client nothing happen
i try and run this command and the result is here
what should i do?
its skype 2016
PS C:\Users\Administrator.PRI> Test-CsClientAuth -TargetFqdn http://srv-skype.pri.local -UserSipAddress alie@pri.local -TargetUri http://srv-skype.pri.local
cmdlet Test-CsClientAuthentication at command pipeline position 1
Supply values for the following parameters:
UserCredential
Target Fqdn : http://srv-skype.pri.local
Target Uri : http://srv-skype.pri.local
Result : Failure
Latency : 00:00:00
Error Message : No response received for Web-Ticket service.
Inner Exception:The remote server returned an unexpected response: (405) Method Not Allowed.
Inner Exception:The remote server returned an error: (405) Method Not Allowed.
Diagnosis :
Inner Diagnosis:Allow : GET, HEAD, OPTIONS, TRACE
Content-Length : 5324
Cache-Control : private
Content-Type : text/html; charset=utf-8
Date : Thu, 17 Jan 2019 09:18:14 GMT
Server : Microsoft-IIS/10.0
Hi All,
I want to implement the enterprise version of SfB 2015 and I would like to know what roles I should install for SfB director server in windows server 2016.
thank you.
kype for Business Server 2019 Deployment Log Collapse All Actions
Action Action Information Time Logged Execution Result
▼ BootstrapLocalMgmt Completed with errors
└ ▼ Bootstrapper.Action 5/22/2023 11:52:05 AM Failed
└ ▼ Bootstrapper main action 5/22/2023 11:52:05 AM Failed
└ ► Validate prerequisites for bootstrapper 5/22/2023 11:52:05 AM Success
└ ► Validate the installation cache 5/22/2023 11:52:05 AM Success
└ ► Discover features currently installed 5/22/2023 11:52:05 AM Success
└ ► Compute list of intended features 5/22/2023 11:52:05 AM Success
└ ▼ Check and install prerequisites 5/22/2023 11:52:05 AM Failed
└ ► Install prerequisites 5/22/2023 11:52:05 AM Success
└ ▼ Install prerequisites 5/22/2023 11:52:05 AM Failed
└ Name of prerequisite: SupportedOSNoDC 5/22/2023 11:52:05 AM
└ Type of prerequisite: block 5/22/2023 11:52:05 AM
└ Method used to check prerequisite state: !SupportedOperatingSystemNoDC() 5/22/2023 11:52:05 AM
└ Result of state check: True 5/22/2023 11:52:05 AM
└ Prerequisite not satisfied 5/22/2023 11:52:05 AM
└
Error: Prerequisite not satisfied: This product cannot be installed on a domain controller.
► Details
5/22/2023 11:52:05 AM Error
└ ► Install prerequisites 5/22/2023 11:52:05 AM Success
└ ► Install prerequisites 5/22/2023 11:52:05 AM Success
└ ► Install prerequisites 5/22/2023 11:52:05 AM Success
└ ► Install prerequisites 5/22/2023 11:52:05 AM Success
└ ► Install prerequisites 5/22/2023 11:52:05 AM Success