Multi-Factor Authentication (MFA) with Microsoft Entra ID: Best Practices and Implementation Guide
In the current Digital Era, protecting user identities and securing access to resources are top priorities for organizations of all sizes. Multi-Factor Authentication (MFA) is a critical security measure that strengthens the login process by requiring users to provide two or more verification factors. Within Microsoft Entra ID (formerly Azure Active Directory), MFA is a key feature that enhances security by adding an additional layer of protection beyond just usernames and passwords.
This detailed blog will cover the fundamentals of MFA with Microsoft Entra ID, outline best practices for its implementation, and provide a step-by-step guide to deploying MFA effectively in your organization.
What is Multi-Factor Authentication (MFA) in Microsoft Entra ID?
Multi-Factor Authentication (MFA) is an authentication method that requires users to verify their identity using more than one method of verification. Microsoft Entra ID’s MFA solution provides a robust, secure way to confirm user identities by combining:
- Something You Know: A password or a PIN.
- Something You Have: A trusted device, such as a smartphone or hardware token.
- Something You Are: Biometric data, like a fingerprint or facial recognition.
By implementing MFA, organizations can significantly reduce the risk of unauthorized access due to compromised credentials, enhancing security for both cloud and on-premises resources.
Key Benefits of MFA in Microsoft Entra ID:
- Enhanced Security: Protects against the most common types of cyberattacks, such as phishing and credential stuffing, by requiring an additional verification factor.
- Improved Compliance: Meets regulatory requirements for data protection and user authentication, such as GDPR, HIPAA, and more.
- Seamless User Experience: Provides a balance between security and convenience, enabling secure access without hindering productivity.
Best Practices for Implementing MFA with Microsoft Entra ID
-
Implement Conditional Access Policies:
- Use Microsoft Entra’s Conditional Access to enforce MFA only when necessary. For example, require MFA when users access sensitive applications or when accessing resources from untrusted locations or devices. This approach balances security and user convenience.
-
Utilize Authentication Methods that Suit Your Organization:
- Choose the appropriate authentication methods based on your organization’s needs. Microsoft Entra ID supports a variety of MFA methods, including:
- Microsoft Authenticator app: Offers push notifications, passwordless sign-in, and OTPs.
- Phone call and SMS: Sends verification codes via voice call or SMS.
- FIDO2 security keys: Provides passwordless authentication using hardware-based keys.
- OATH hardware tokens: Generates time-based one-time passwords (TOTP).
-
Adopt a Risk-Based Approach to MFA:
- Use Microsoft Entra’s Identity Protection to detect and respond to risky sign-ins or user behavior. Configure policies that trigger MFA when there is a high likelihood of a compromised account.
-
Regularly Monitor and Review MFA Usage:
- Utilize the reporting and monitoring tools in Microsoft Entra to track MFA usage and identify any patterns of non-compliance or unusual activities. Regular audits help to ensure MFA policies are effectively protecting your resources.
-
Educate and Train Users:
- Conduct training sessions and provide resources to help users understand the importance of MFA, how it works, and how to set it up. Clear communication reduces resistance and promotes adoption.
-
Implement Passwordless Authentication Where Possible:
- Move toward a passwordless authentication model by using methods like the Microsoft Authenticator app or FIDO2 security keys. Passwordless MFA reduces the risks associated with password theft and reuse.
Step-by-Step Procedure to Implement MFA with Microsoft Entra ID
Step 1: Prepare Your Environment
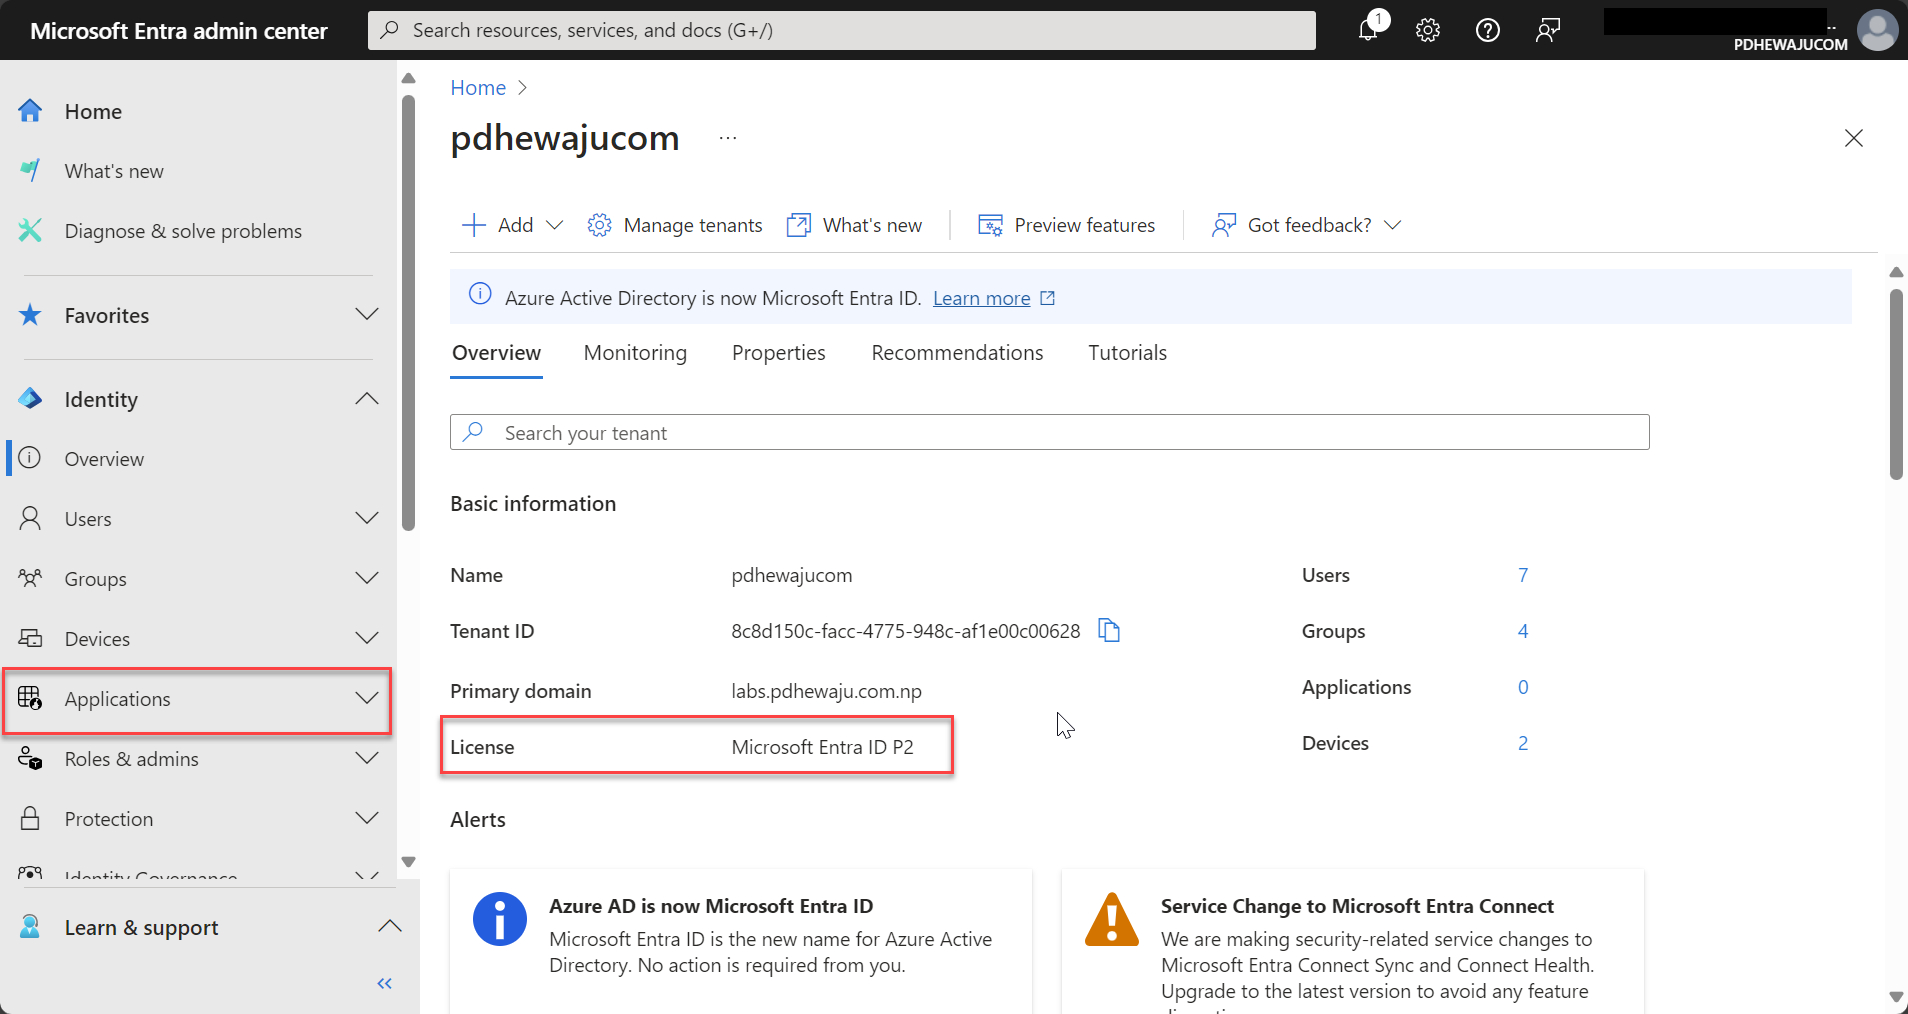
- Verify Licensing Requirements:
- Ensure your organization has the appropriate Microsoft Entra ID licensing (such as Microsoft Entra ID P1 or P2), which includes MFA and advanced security features.
- Assess Your User Base and Applications:
- Identify which user groups and applications will require MFA. Prioritize high-risk users and sensitive applications, such as those involving financial data or personal information.
- Plan Your MFA Rollout:
- Decide whether to implement MFA for all users at once or use a phased approach, starting with high-risk users or specific departments. A phased approach allows you to gather feedback and address issues before a full rollout.
Step 2: Configure MFA in Microsoft Entra ID
- Access the Microsoft Entra Admin Center:
- Go to the Microsoft Entra admin center and sign in with an account that has the necessary administrative permissions.
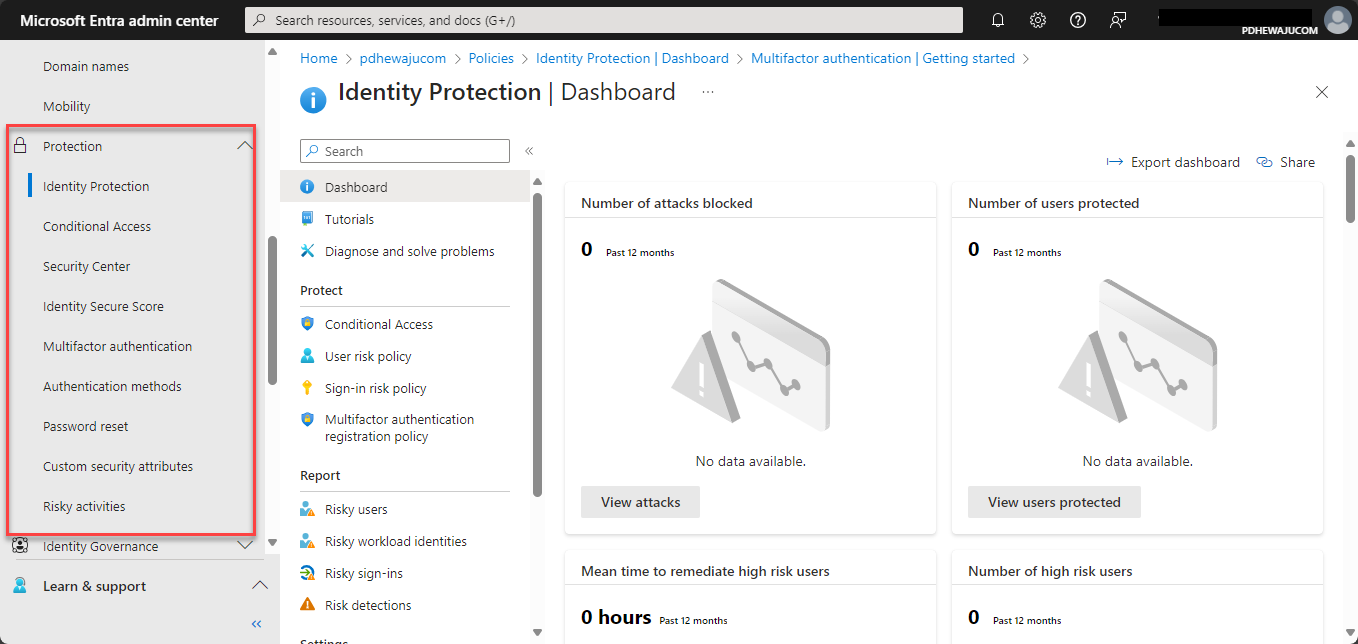
- Navigate to Security Settings:
- From the left-hand navigation pane, select Identity > Protection > Multi-Factor Authentication.
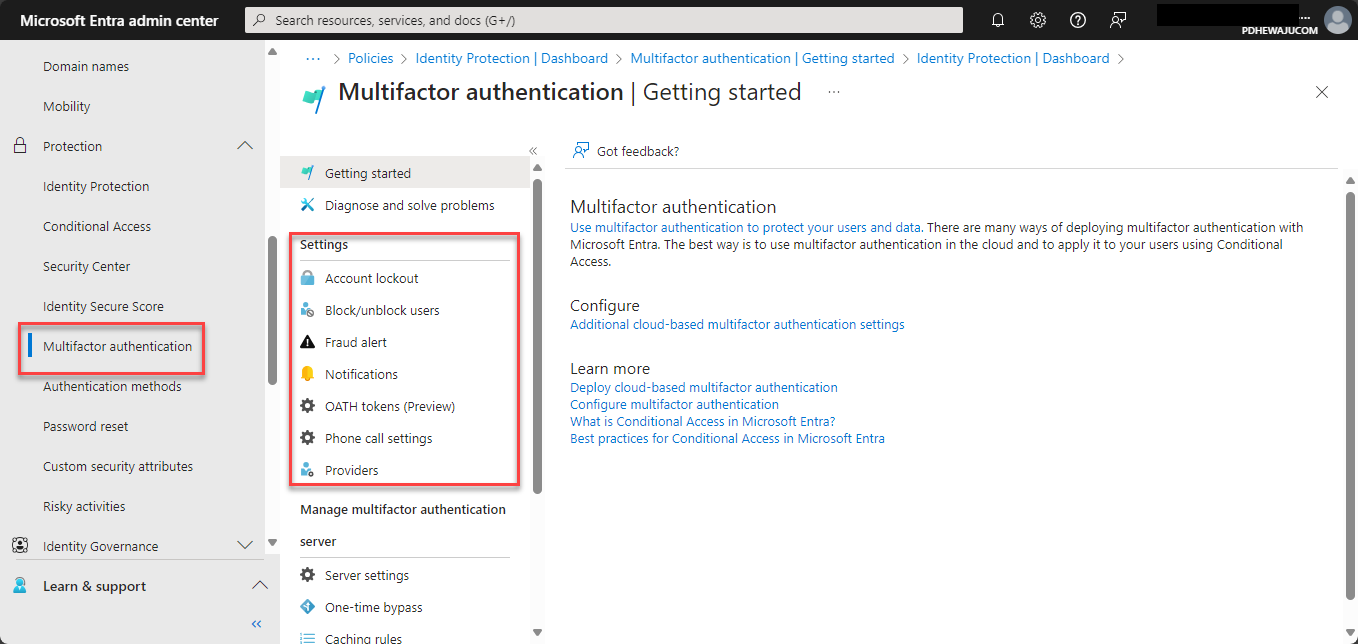
- Enable Multi-Factor Authentication:
- Under Multi-Factor Authentication, select Users and choose the user groups for which you want to enable MFA. Click on the Service Settings tab to configure additional options, such as trusted IPs and app passwords.
- Select MFA Authentication Methods:
- Choose the authentication methods you want to enable for your users. For example, enable the Microsoft Authenticator app, SMS, phone calls, or FIDO2 security keys.
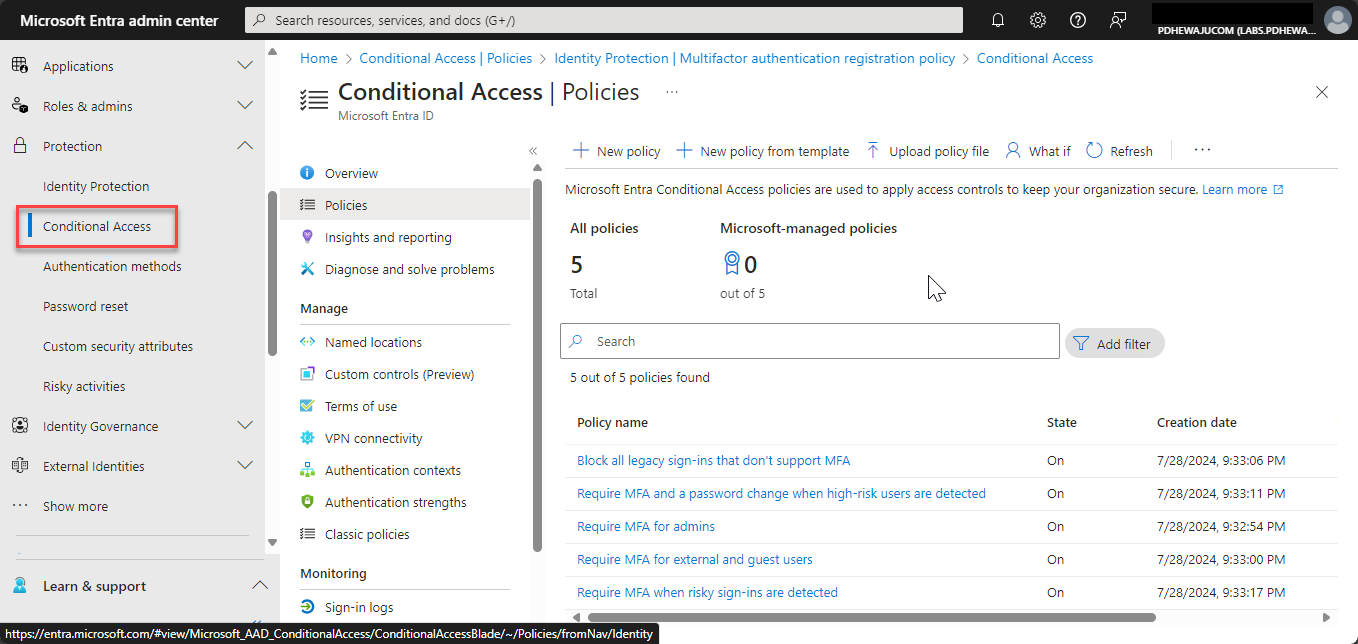
- Configure Conditional Access Policies:
- Navigate to Security > Conditional Access > New policy to create a new policy that enforces MFA. Specify the conditions under which MFA is required, such as access from untrusted locations or high-risk sign-ins.
- Test the Configuration:
- Test the MFA setup with a small group of users to ensure it works as expected. Verify that users are prompted for MFA under the correct conditions and that all selected authentication methods are available.
Step 3: Roll Out MFA to Users
- Communicate the Change to Users:
- Notify users about the upcoming change and provide clear instructions on how to set up MFA. Offer support and resources to help them with the setup process.
- Roll Out MFA Gradually:
- Implement MFA for a pilot group of users first. Gather feedback, identify any issues, and make necessary adjustments. Once the pilot is successful, expand the rollout to the entire organization.
Step 4: Monitor and Optimize
- Monitor MFA Usage:
- Use the Sign-ins and Audit logs in the Microsoft Entra admin center to monitor MFA usage and identify any potential security threats or user issues.
- Adjust Conditional Access Policies:
- Refine your Conditional Access policies based on user feedback, emerging threats, and changing business needs.
- Regularly Review and Update MFA Policies:
- Regularly review and update your MFA policies to ensure they align with the latest security standards and organizational requirements.
Conclusion
Implementing Multi-Factor Authentication (MFA) with Microsoft Entra ID is an essential step toward enhancing your organization’s security posture. By following best practices and a structured implementation process, you can ensure that MFA is effectively deployed, balancing security and user experience. Leveraging advanced features like Conditional Access, Identity Protection, and passwordless authentication can further strengthen your defense against unauthorized access.
Start your MFA journey today with Microsoft Entra ID to safeguard your digital assets and ensure secure access for your users.

How Long Has Your System Been Running?
Adjust time on Aero peek on windows 7

Disabling Basic Authentication on Exchange Online
About Author
pdhewjau
Prashant is a Principal Cybersecurity Specialist at Thakral One Nepal. His prior position as a Modern Work Security Specialist at Microsoft saw him providing invaluable guidance to major clients in Bangladesh, Brunei, Cambodia, and Myanmar, assisting them with their foundational security needs. Awarded the esteemed Microsoft Most Valuable Professional (MVP) accolade in 2017, Prashant is recognized globally among Microsoft peers. Since 2010, he has imparted his expertise as a Microsoft Certified Trainer (MCT), conducting specialized training across Nepal.